
|
0 Comments
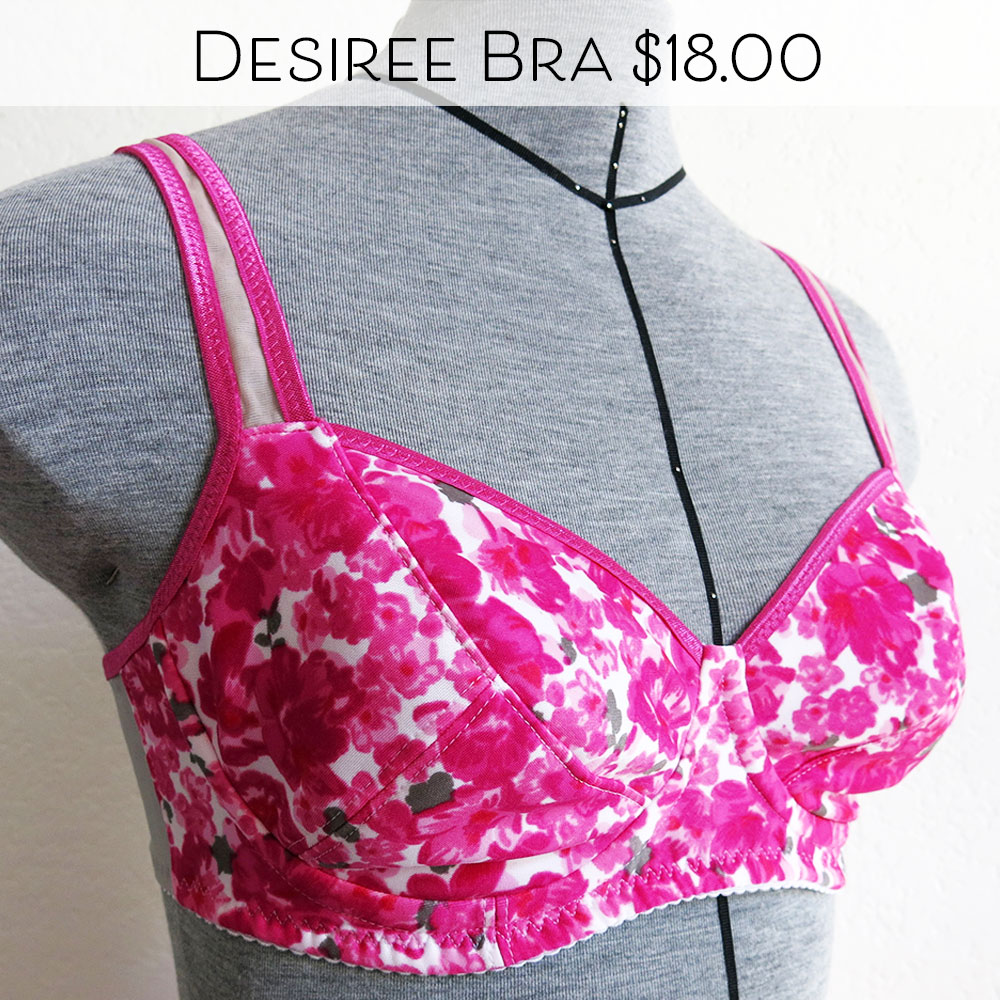
Bodies come in all shapes and sizes, and very rarely do we fit perfectly into a pattern straight away. Pattern designers create patterns with a measurement chart of "standard sizes", but each size chart will vary by company. You might fit perfectly into a single size, or you might find that your individual measurements span several sizes. In the tutorial below, I will share you with how to adjust your panty patterns when your waist and hip measurements fall between two different sizes.
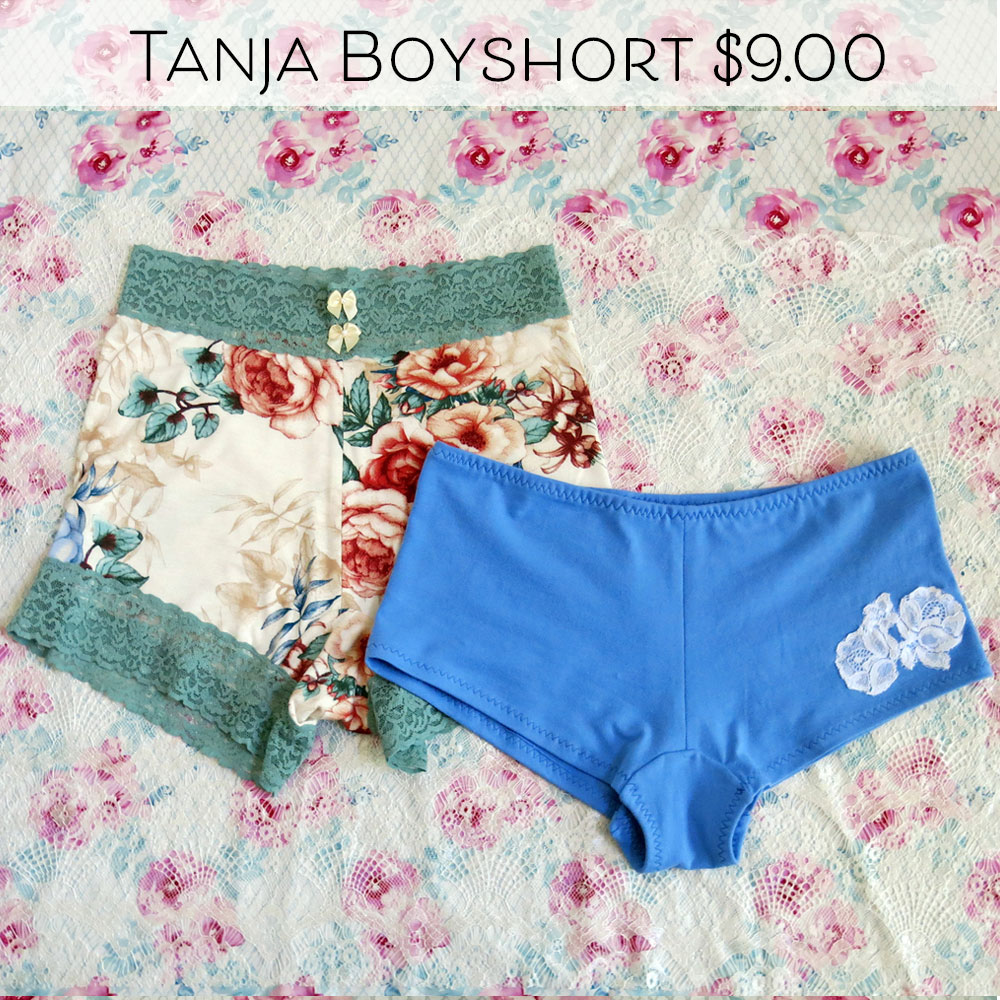
Ahead of publishing my new lace boyshort pattern, I wanted to share with you a pattern alteration to help achieve the best fit in boyshorts. Do you ever find the back of the leg opening gaping at the bum? Perhaps you have a flatter bum or narrower hips than what the pattern is drafted for. Below is a simple pattern alteration to shorten the width of the leg opening to get a smoother fit. Problem: Gaping at the bum Symptoms:Excess fabric and looseness at the back leg opening Solution: Shorten the width of the leg openingDetermine the excess amount and divide by two. For this example, let's use 1" as the excess amount; divided in two and we have 1/2". On the pattern piece, bring in the inseam at the leg opening 1/2" on each side. You can see the new inseam and leg opening lines below drawn in red. Measure the new inseam length on each side to make sure the lengths match. Adjust if necessary.  If you are using a pattern with elastic or bands to finish the leg opening, you will need to shorten those lengths as well.
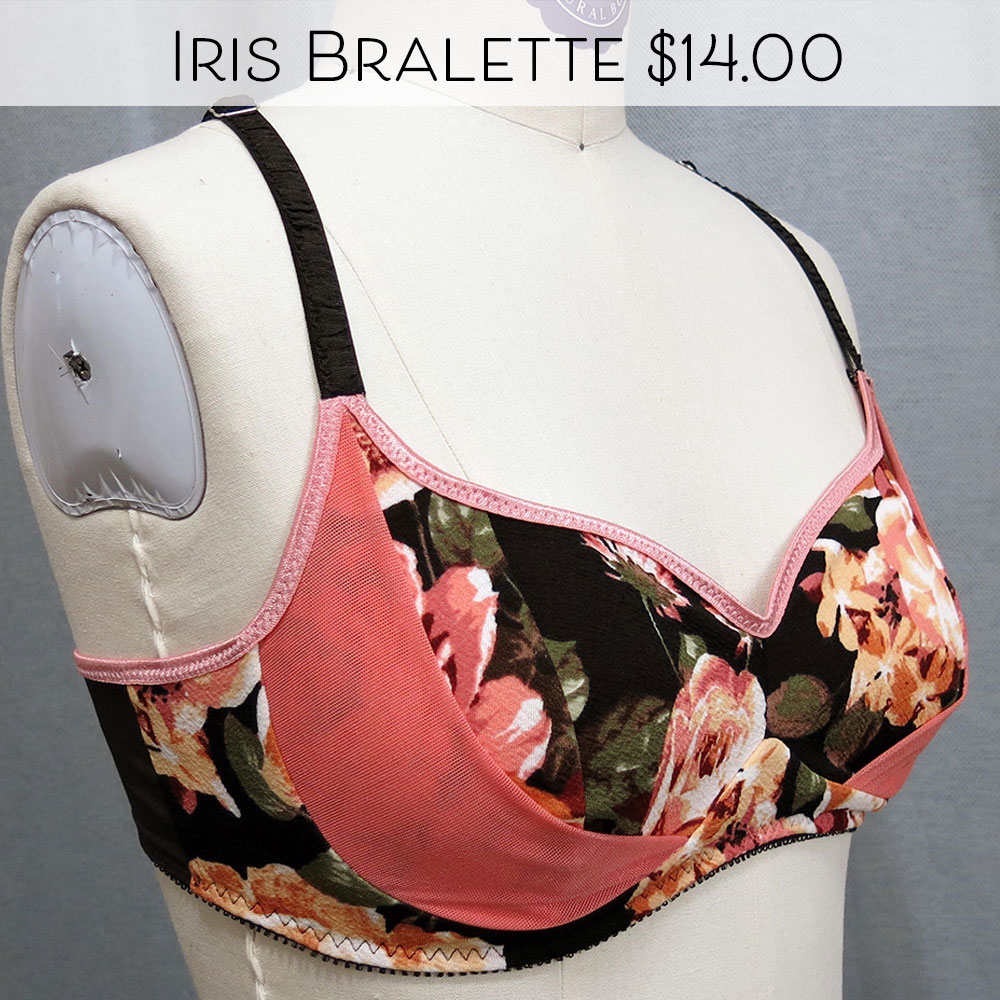
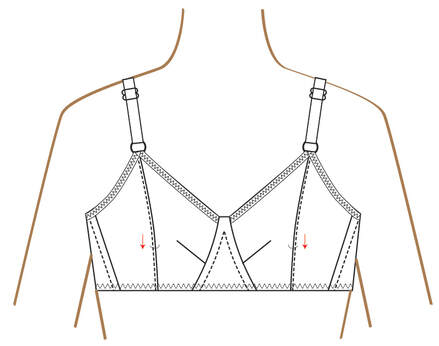
If you have any questions, or suggestions for other panty fitting tutorials, leave me a comment below. Until next time, Happy Sewing. I’ve already covered pattern alterations for adjusting the rise for a different torso length, which affects both the front and back rise length. But what do we do when the back rise length is good, and the front rise dips too low? Problem: The back rise fits well, but the front rise dips too low  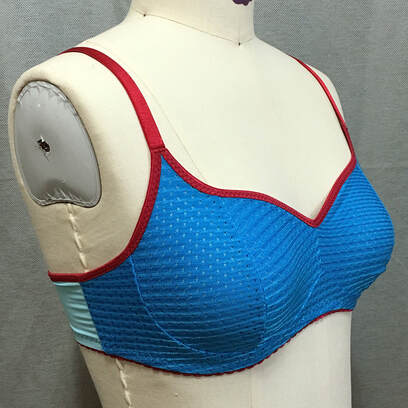 For the best fit on the Iris Bralette, you will want the vertical seam to fall in line with the apex. What is the apex?The apex is the fullest part of the bust, usually where the nipple lies. In the photo above, you can see that the vertical seam aligns with the fullest part of the bust, and also aligns with the vertical seam on the dress form.
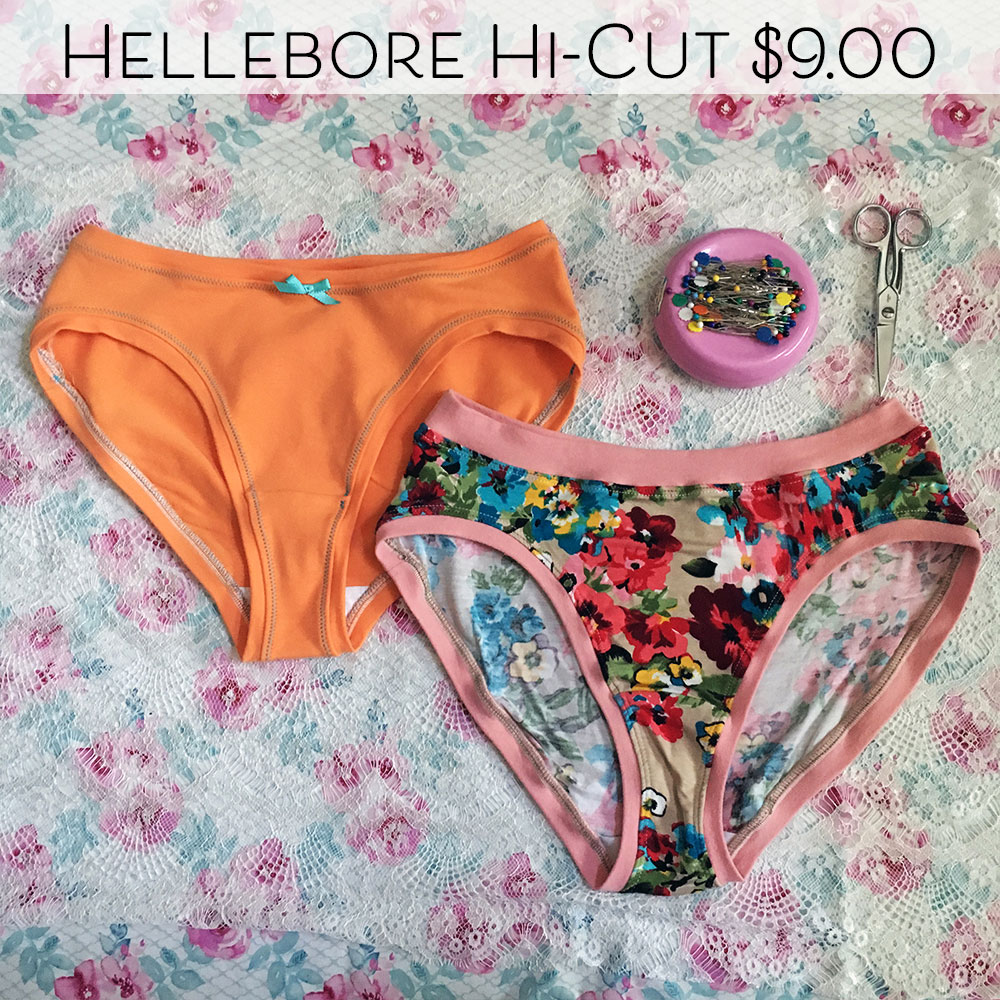
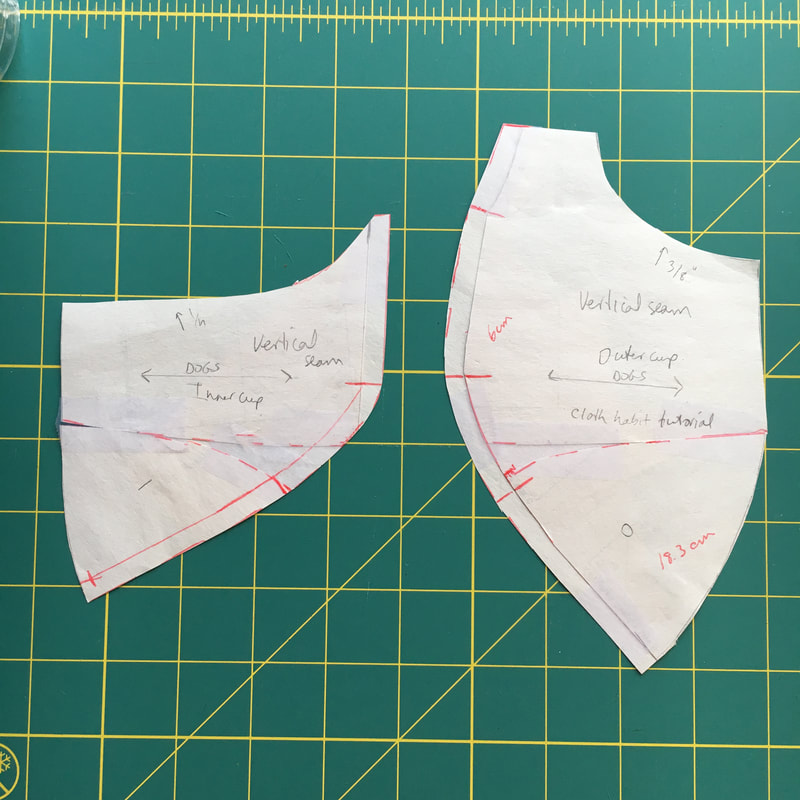
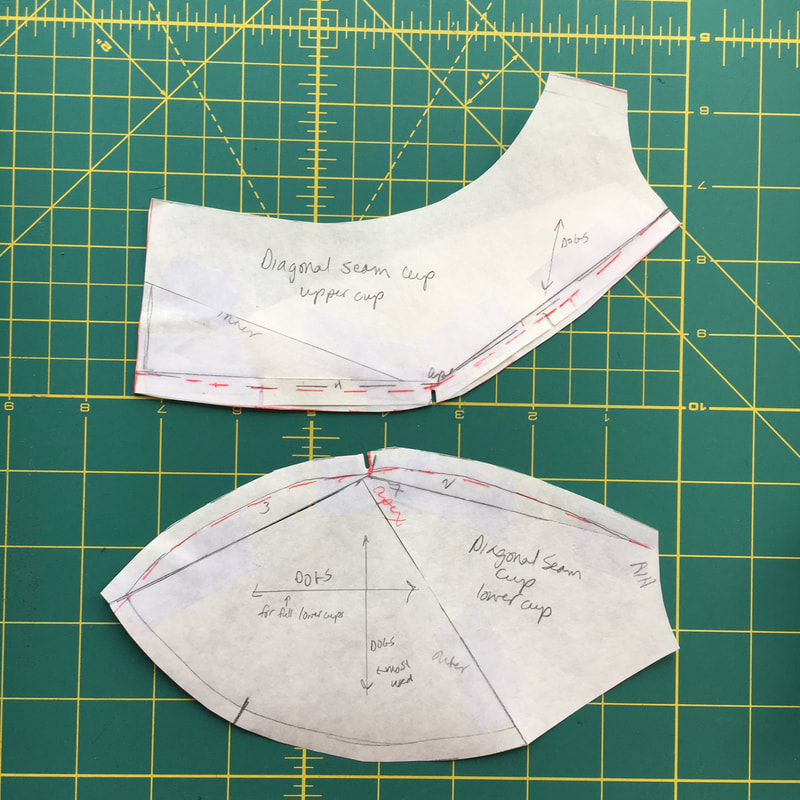
Next up in my fitting and alteration series is changing the rise length. Wanting to change the rise length might be a personal preference, or it may be due to a difference in torso length. For this fitting/alteration exercise I'm going to assume that it is due to a different body shape than what the pattern was drafted for. During the testing phase of the Hellebore Hi-Cut, one of my testers said she was surprised by how very high cut the legs were, and her pair seemed to be much higher than the pictures indicated. After a bit of conversation, we determined that her crotch length was 2" shorter than the length indicated for her size. Let's use this same fitting problem here: Problem: The rise is too long, but waist and hip measurements are correct.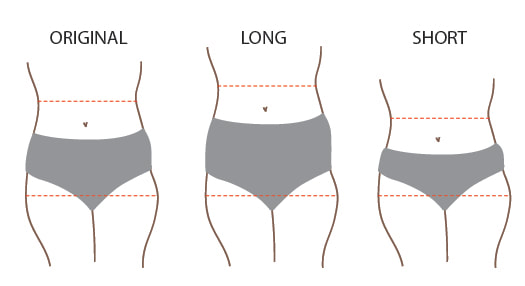 Next up in my panty fitting series is probably the most common problem I see; the back of the panty sliding into the bum and causing much discomfort. In American English we call it a wedgie. What causes it and how do we fix it? Let's take a look. Problem: The back of the panty is sliding into my bum Creating a test garment and fitting a pattern is pretty standard among sewists, because rarely do we fit into whatever standard measurements a designer uses. Ready-to-wear clothing is designed to fit a wide range of bodies, which is why it tends to have lots of ease and fabric that stretches whenever possible. But what about undergarments? Something that is worn so closely against the body needs to be fitted carefully, and I haven't seen too many resources for fitting panties. So here I am with a short series of fitting problems you might encounter while fitting your undies. Problem: The gusset is too wide 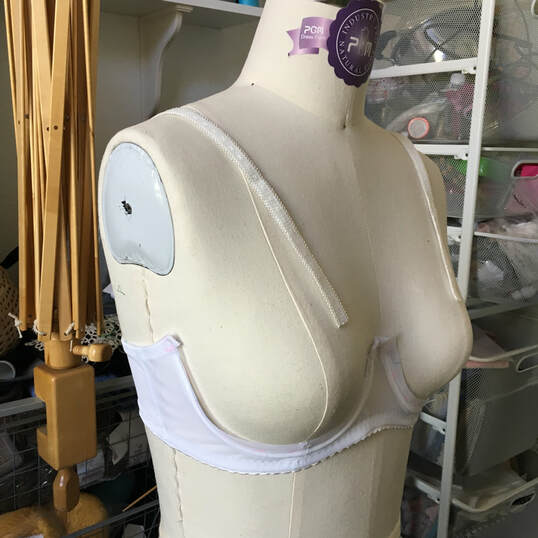 Today I made a bra fitting band following the instructions on the Merckwaerdigh blog. A bra fitting band serves two purposes: 1. When first fitting a bra pattern, after finding the correct wire, the next step is to fit the band. It is easier to fit the bra in steps than try to fit the underwire, band and cups all at the same time. 2. Even though I now have a well-fitting bra pattern, I want to try out different bra cup designs, and rather than make an entire bra every time I make a style change, I can sew up a single cup to check the design and fit. To begin, cut out the bridge, cradle, and back band pieces. Since this is only for fitting, I cut a single layer of simplex for the bridge and cradle and didn't bother with lining. 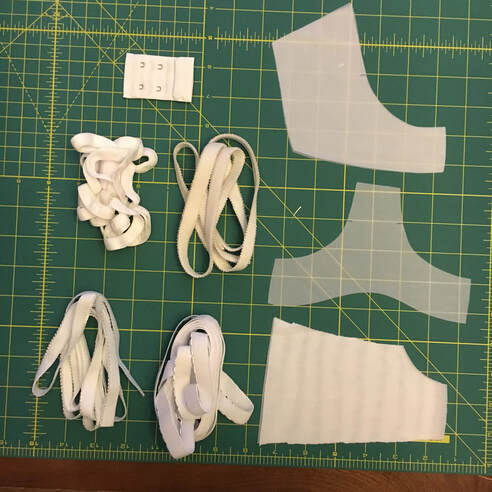 Sew the elastics on as usual. This would be a good opportunity to use up scraps, and you could zigzag together shorter pieces if necessary. I didn't happen to have any scraps in the correct widths, so I just used white. 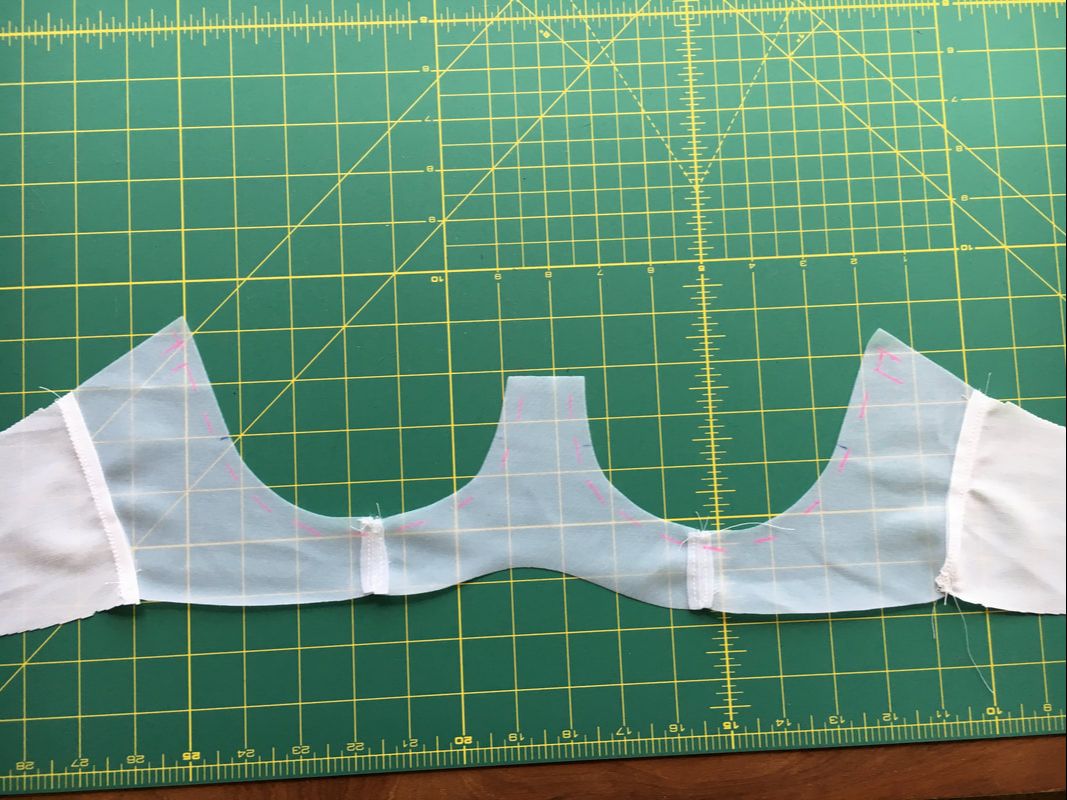 If I was sewing a regular bra, the next step would be to sew the channeling to the cup/cradle seam allowances. Since I don't have a cup, I marked out the seam allowance on the cradle and sewed the channeling below the markings. I sewed the channeling to the inside of the bra, but it could work on the outside as well. Finish the underarm elastic as usual. As you can see in the picture below, I inserted the wires and closed the channeling at the center front. Don't do that! As soon as I started to sew on a tester bra cup I realized the underwire would be in the way (duh) and I had to unpick the seam. So leave one end of each channeling open. 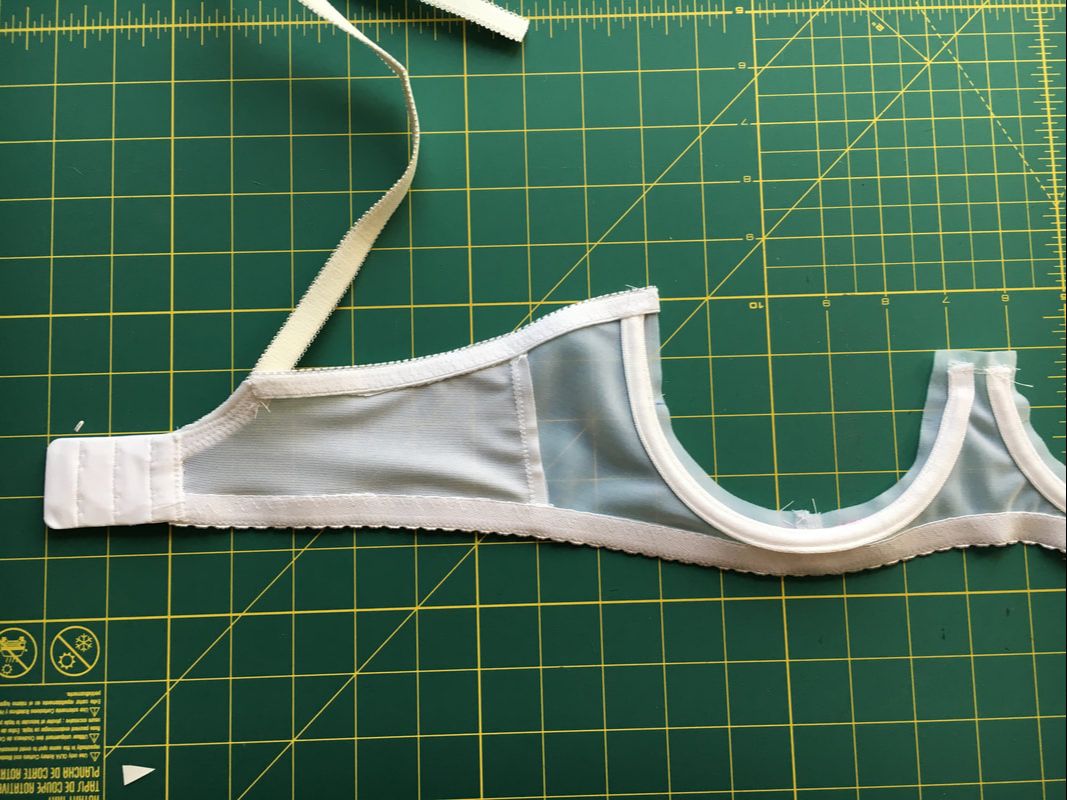 And here is the fitting band on my dress form. The straps are just pieces of elastic, I figured it would be simpler to pin the front of the straps to the cups and didn't bother with rings and sliders. 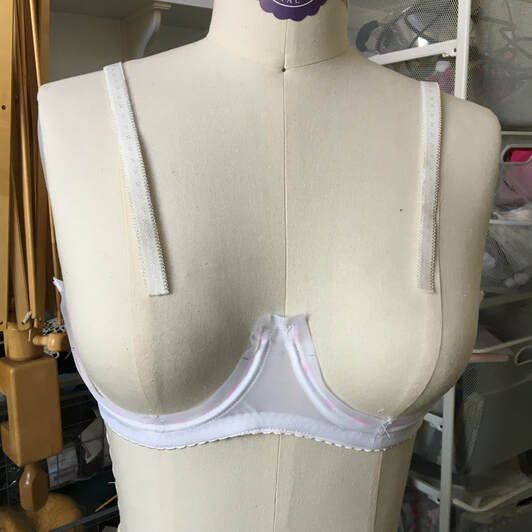 Now the new cup styles. My self-drafted bra has horizontal cup seams, and I wanted to try both vertical and diagonal seams.
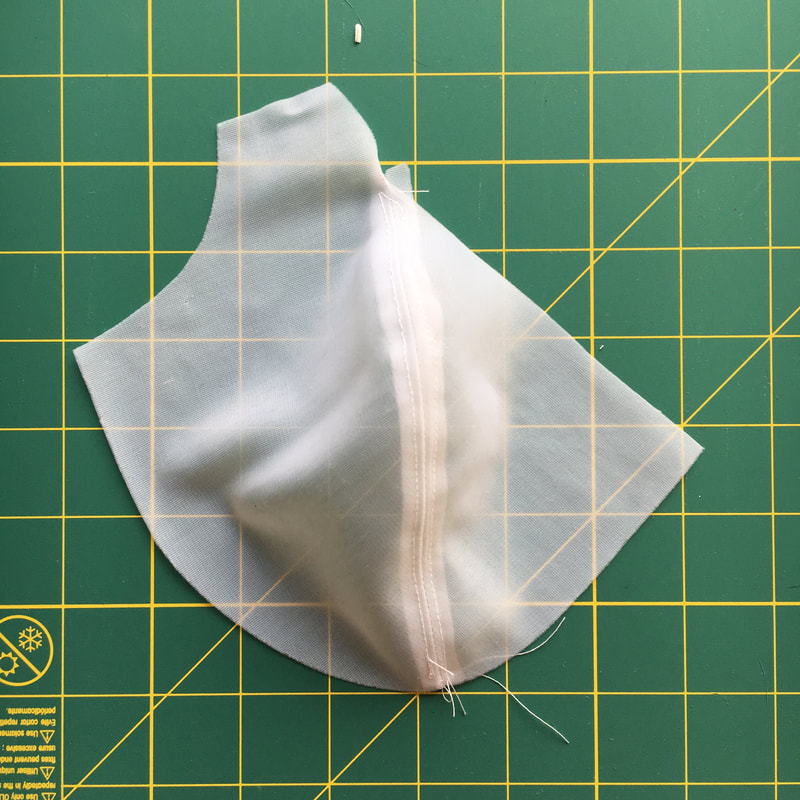
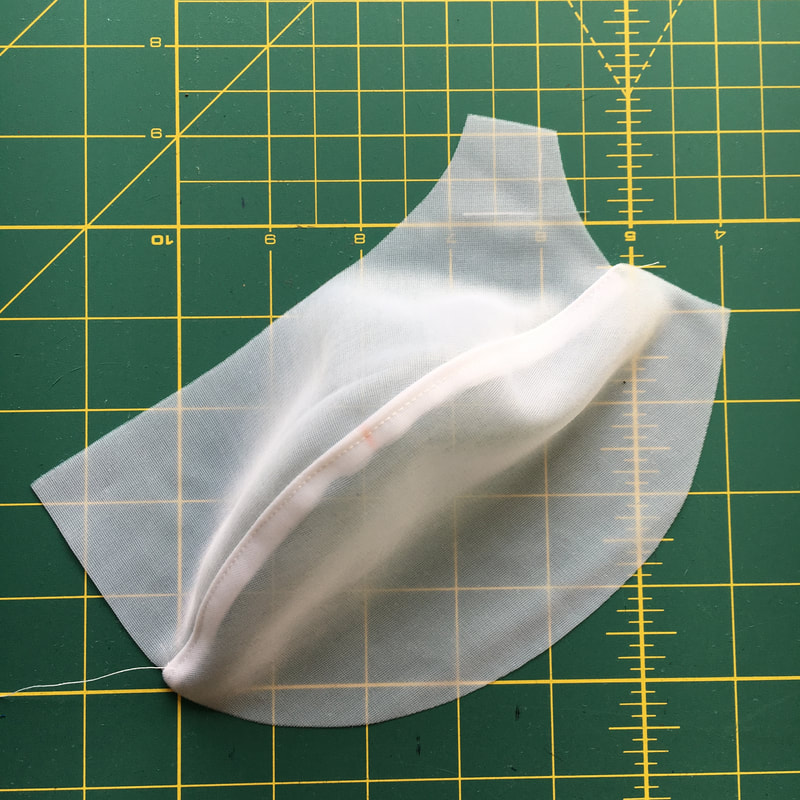
I cut and sewed one cup in each style, with the vertical seam as a right cup and the diagonal seam as a left cup.
After removing the underwires from the channeling, I basted the cups into my fitting band, keeping in mind that extra seam allowance would stick out at the underarm edge that would normally be finished with elastic. Looks like I forgot to add seam allowance to the neck edge of the vertical cup. Oops! Now pop the underwires back in and try it on. 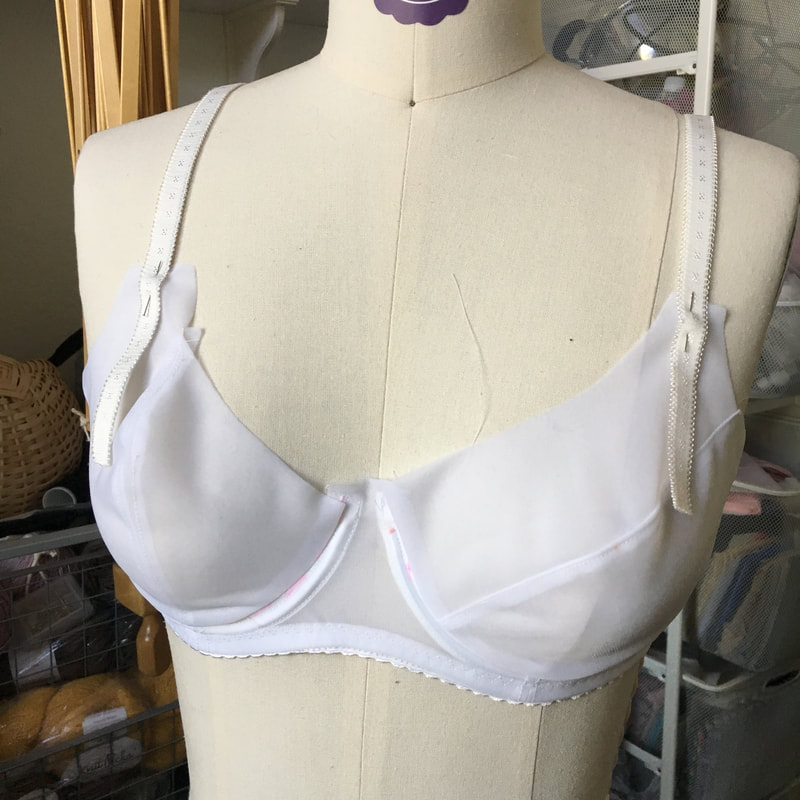 My dress form is not as squishy as I am, and doesn't have as much lower cup fullness as I do. The diagonal seam cup fits me very well and doesn't seem to need any changes. There is some weirdness in the fit of the vertical seam cup. Horizontal wrinkles in the lower part of the cup seem to indicate not enough room, and the bulging above the apex means there is too much curve in the seam. Looks like I have some alterations to work on!
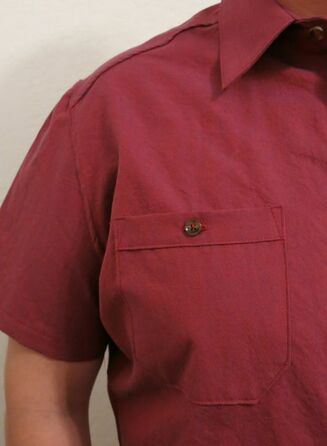
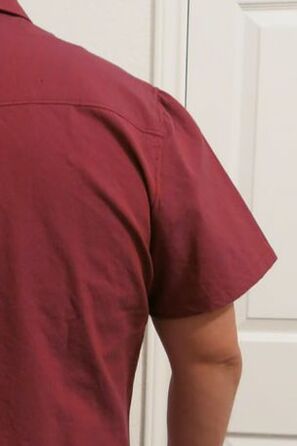
Remember the red shirt I made my husband for Valentine's Day? He loves it and has worn it several times, but there is a fit issue still bothering me.
Diagonal wrinkles from the armhole up towards the neck. This is a common fit issue in RTW shirts for him as well. I searched through all my books on fitting, and all of them say the problem is sloping shoulders. Before I made this shirt, I had adjusted the shoulder slope several times and I really didn't think that was the problem. The typical shoulder slope adjustment is to lower the shoulder line at the armhole edge, and then lower the armhole by the same amount to preserve the armhole length. The wrinkles in this shirt were not loose; in fact they were quite tight on his body. Just to be sure the problem was not the shoulder slope, I followed the instructions in this video from Threads, and traced around my husband's neck and shoulders to check the slope against the pattern. 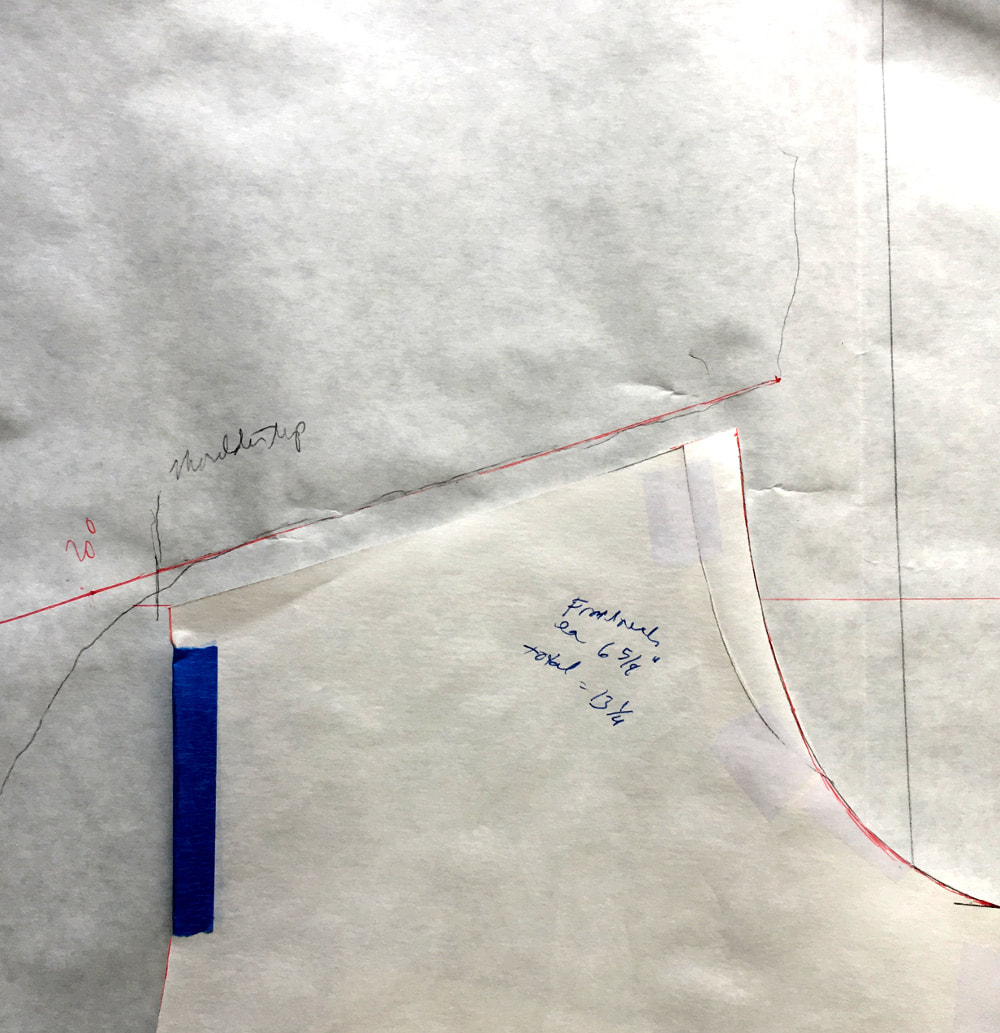 Spot on! So if that wasn't the problem, then what was? I continued to do more research on the internet, and came across a post in a sewing forum of someone having a similar problem in fitting a men's t-shirt. The issue? Atheltic build. More fabric is needed in the upper back and upper chest to accommodate muscles. So I traced off the pattern onto tissue paper, and drew lines across the upper chest and back. Beginning at the center, I cut them open, leaving a hinge at the armhole. I had my husband try them on carefully, and I let the tissue hang open. Sure enough, he needed about 1" on the front and 3/4" on the back for the tension in the tissue to be released. I don't have pictures of the fitting because he gets antsy and I need to work as quickly as possible. While I try to be professional (even with my spouse) during a fitting, I think he still feels I am negatively judging his shape and not the shape of the pattern. Something for me to work on, I think. 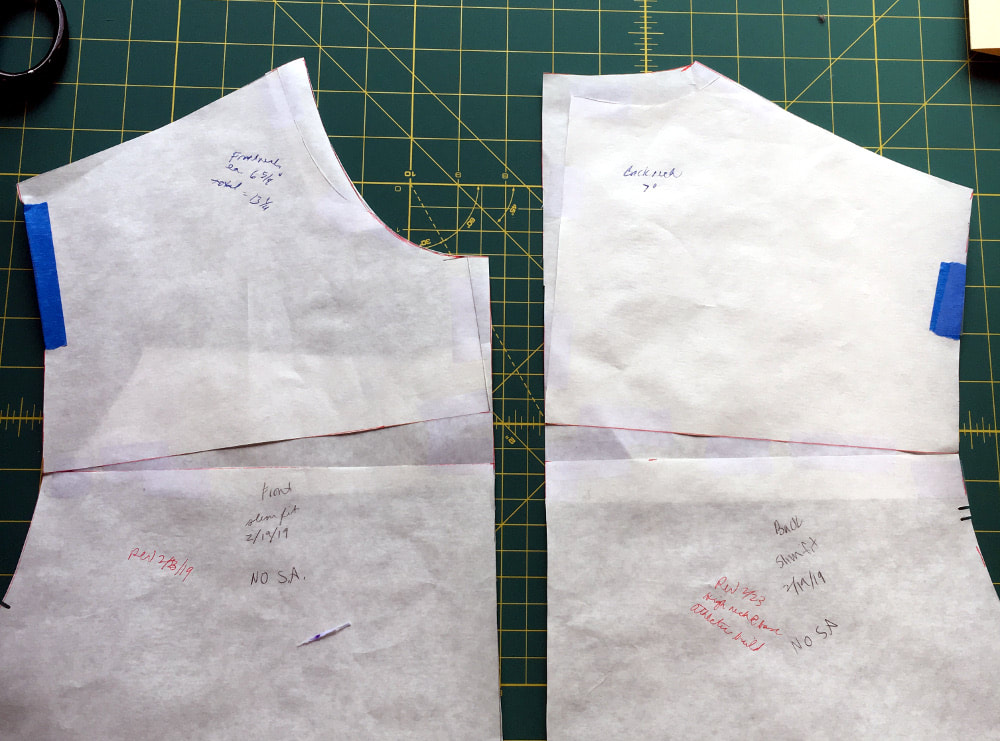 I had to re-draw the neckline, and also straighten the center back and center front seams. Time to work on a new muslin! These fitting issues are making me wonder if it would be worthwhile to develop a men's shirt pattern for athletic builds. The Sewcialists recently posted an interesting article on sewing for plus-size men. Sewing patterns for men already seem to be limited, and plus-size even more so. I already have a long queue of patterns I wish to develop, but I think I will add in a men's shirt for athletic builds in larger sizes.
Do you sew clothes for men? What sort of fit issues do you have? |

CassieI design lingerie sewing patterns for everyday comfort and feminine style in an inclusive size range. Fill up your underwear drawer with beautiful custom-made bras and panties in your favorite fabrics and trims, designed to fit your body. 


Categories
All
Archives
March 2024
|
 RSS Feed