
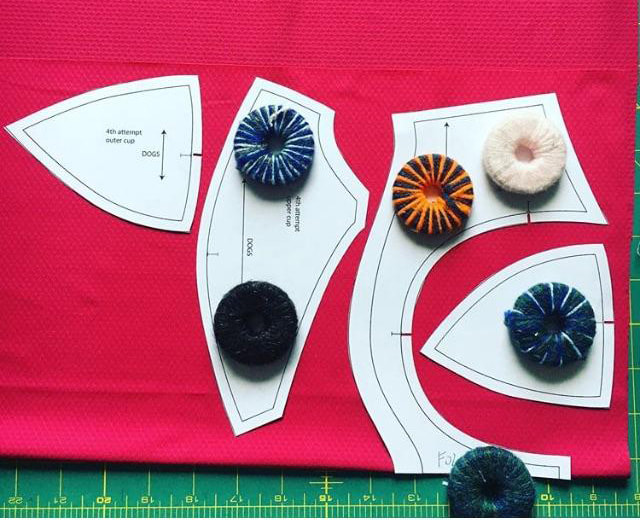
 I'll begin this post by saying I have not been paid in any way to endorse or give a review of this book. I'm just a bra-making fangirl giving her opinion! I was so excited when Jennifer Lynne Matthews-Fairbanks came out with the 3rd edition of her book Bare Essentials: Bras. This new edition has a whole new drafting method that takes into account torso size and shape for a completely custom fit! I have the previous edition of her book and found it monumentally helpful for drafting bra patterns. I haven't been completely satisfied with my Shin draft, (there were too many unexplained variables in the drafting instructions) so I wanted to try a different drafting method and compare. I wish I could say I was meticulous and documented my whole process with photos, but I didn't. Once I get my math and drafting mojo, I jump in and work without stopping. The calculations in the book look intimidating, but Jennifer made a handy bra calculator to do the hard work for you. I couldn't figure out how to print the results, so I took a picture with my phone. 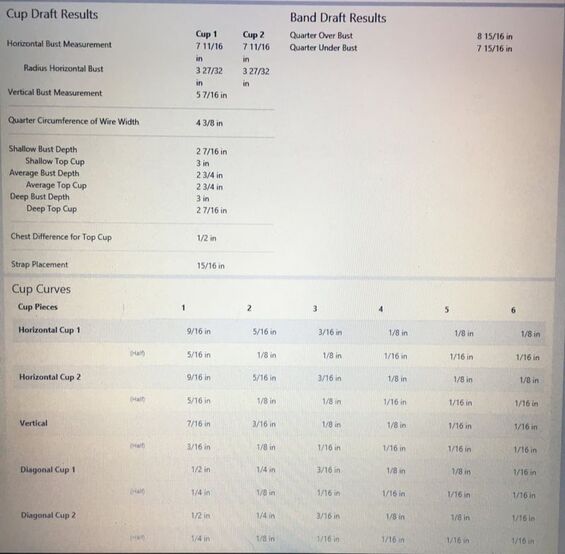 I like to draft in Adobe Illustrator, but I think most people drafting their bras are working by hand. This book covers both methods, which I found very helpful. Here's a peek at the first few steps of my drafting. 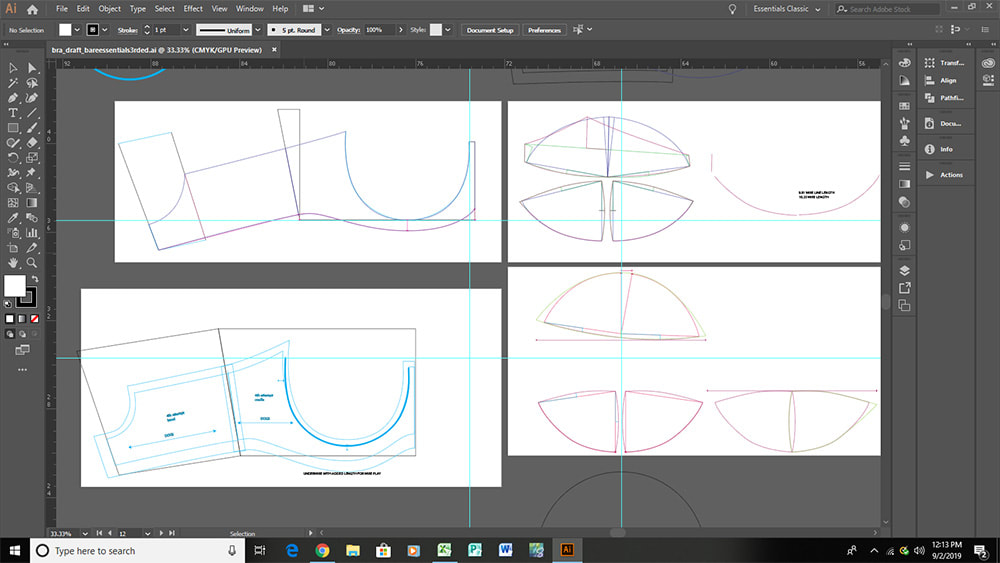 I decided to use a new wire, the Carmen by Emerald Erin. I have wide roots, and the shape of this wire seemed like it would be a better fit for me than a regular wire. The problem? The Bare Essentials calculator is designed to use the wires (either regular or vertical) from Jennifer's store, Porcelynne. Maybe I shouldn't say it's a problem, just took a bit more effort from me since I wasn't using her standard wire shape. I drafted the whole bra and found that the cups did not fit into the frame. The issue was my new wire; the length was different than a regular wire length. So after I adjusted everything, I printed out my pattern and made a practice bra. I used the suggested 2.5% curves and ended up with a very shallow cup. Not even close to enough projection. I upped the curves to 5%, which is suggested for people using vertical wires and the fit was much better. Here's a peek at my cup pieces. 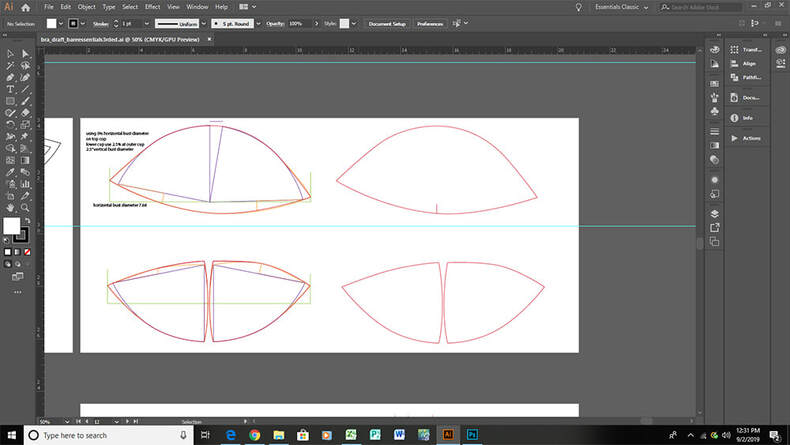 I'm happy to say that after fitting this version of the pattern pieces, I only needed very minor changes. This process was challenging, but in a good way. It helped me understand more the architecture of a bra and how the pieces work together to fit my particular shape. Here is the final made up version of my draft. There is wrinkling in the cups because the fabric stretched a bit too much while I was sewing, and unfortunately I didn't see that one of the cups was set in crooked until I had finished the whole bra. Oops! I used a wicking bra kit from Emerald Erin. 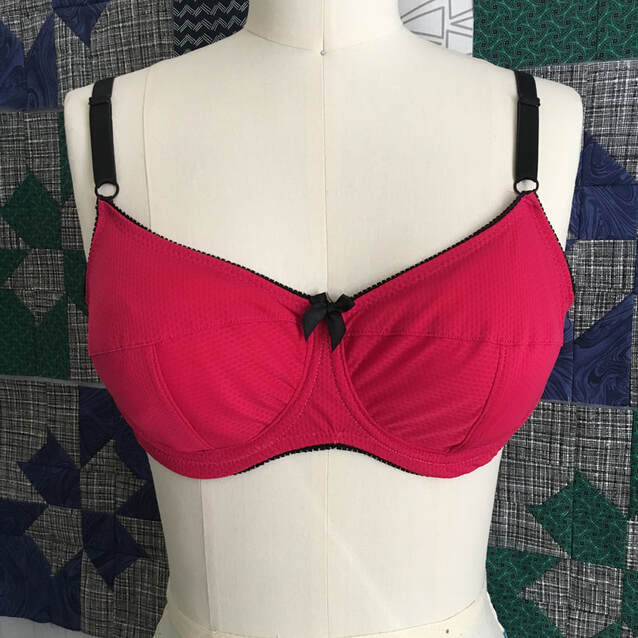 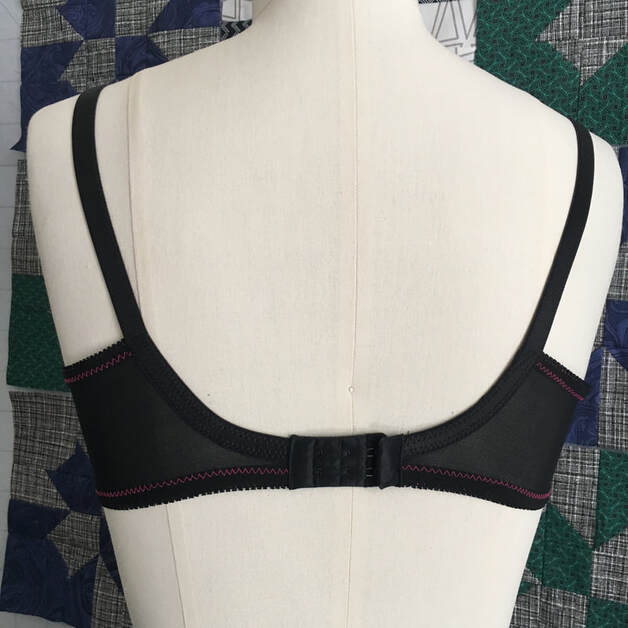 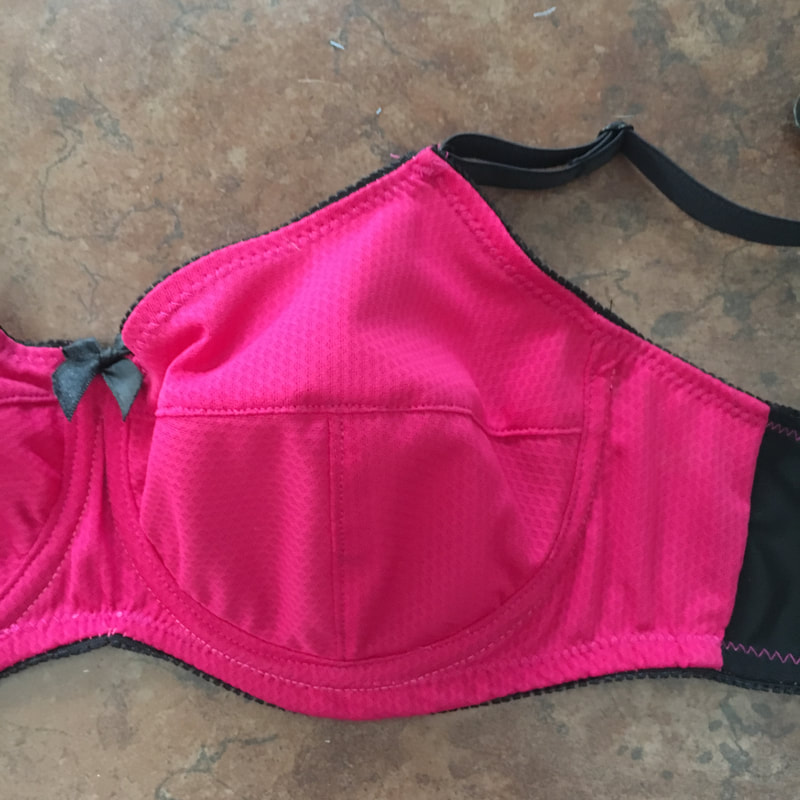 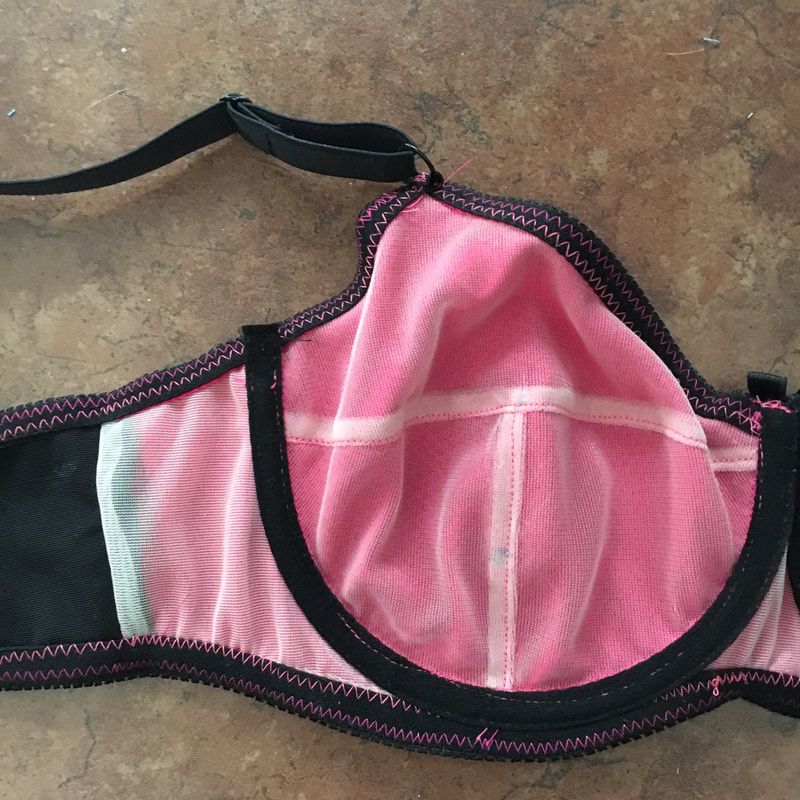 I've worn this bra a few times, and have a few minor alterations to make to the pattern. The band is a bit too long, so I'll shorten it. The sides come up a bit too high into my armpit, and there is too much excess between the end of the wire and the end of the channeling. I'm always worried about there being enough room for the wire to move, but I think I went overboard.
So what's next? After finalizing the fit, the pattern pieces are turned into a sloper, for making custom designs. Stay tuned for more information!
1 Comment
Vanderléia
5/26/2022 10:50:59 am
Hello from Brazil ! I was in doubt if I should or not buying Porcelynne Book Third Edition, and your rewiew helped me a lot. Thank you Leave a Reply. |

CassieI design lingerie sewing patterns for everyday comfort and feminine style in an inclusive size range. Fill up your underwear drawer with beautiful custom-made bras and panties in your favorite fabrics and trims, designed to fit your body. 


Categories
All
Archives
March 2024
|
 RSS Feed