
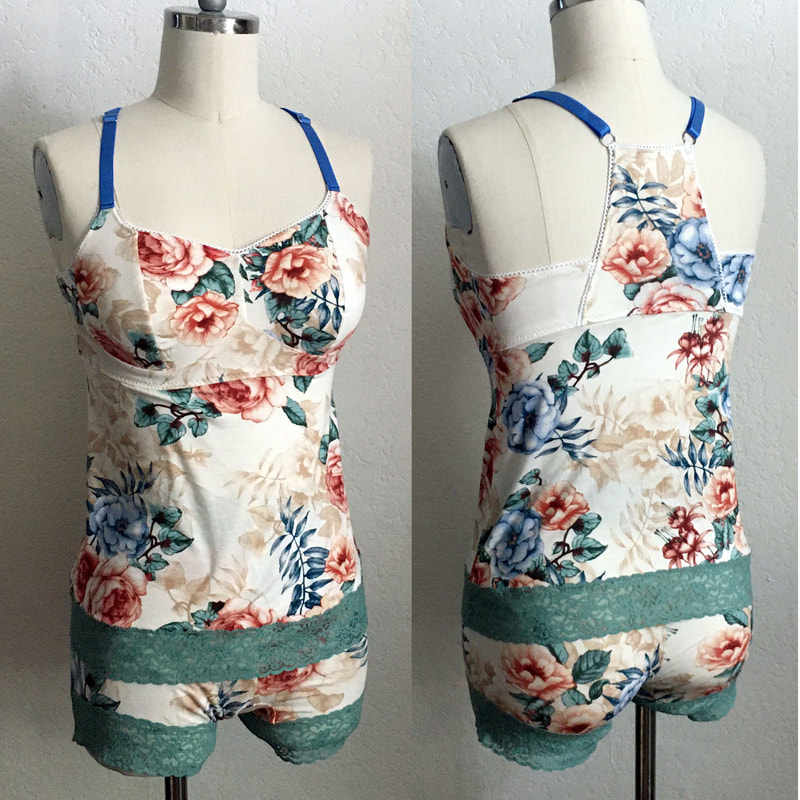
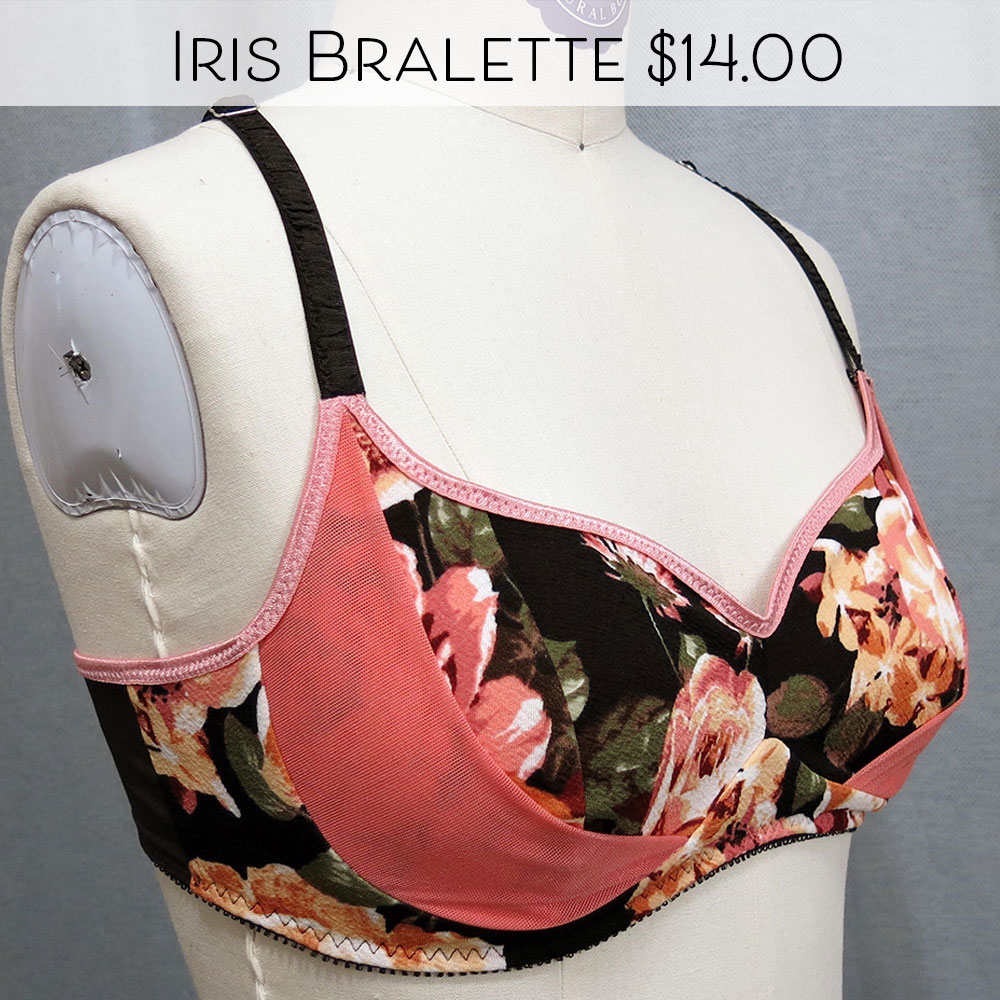
 Iris Bralette camisole hack, shown with Tanja Boyshorts
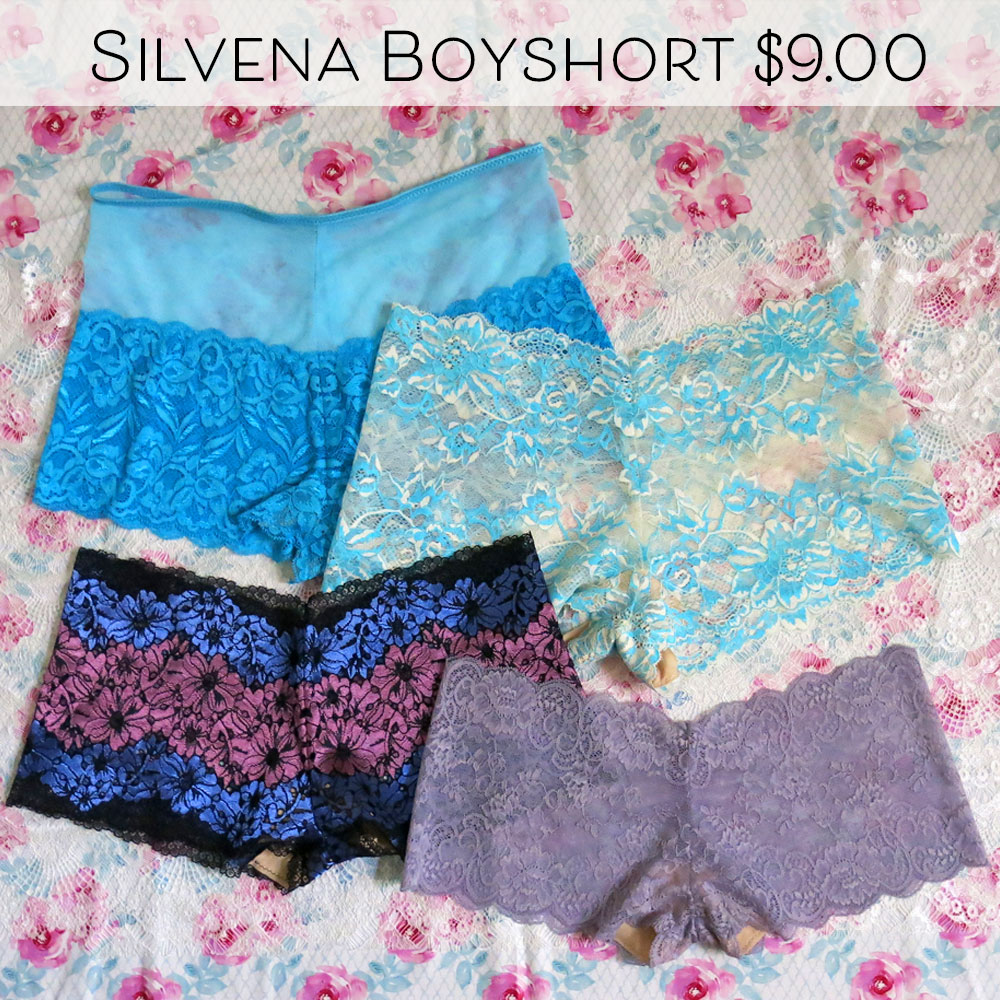
As the temperature has been rising, I realized I need some new pajamas for spring and summer. I am in love with my Tanja Boyshorts with lace edges, and wanted to make a top to match. Rather than draft a pattern from scratch, I decided to create a pattern hack for the Iris Bralette and create a camisole. This is a very simplified pattern hack; I wanted to keep it easy for you rather than get very technical with the nuances of pattern drafting. First, we will need a couple measurements, so grab your measuring tape. MeasurementsAt center front, measure from the bottom of the bra band (underbust) down to the desired length. If you have already made an Iris Bralette, wear it while measuring to get the most accurate measurements. I want my camisole to come down to about my high hip. My center front length, underbust to high hip, is 10”. Next, measure the body circumference at your desired length and add some ease. I recommend adding 4-5” ease. My body circumference at the high hip is 35”, and I added 5” ease for 40”. If you want to make more of a flared babydoll top, I will show you another drafting variation later on in the tutorial for adding more volume. Pattern DraftingGather up your pattern pieces! For drafting we will need the cradle and back band. Also we will need some paper for drafting. I use a big roll of white craft paper I bought at a teacher supply store. 1. Alter cradle: Trace off a copy of your cradle. Square down a vertical guideline at center front. From the lowest point of the underbust curve, square a horizontal line to the center front. We don’t need the curve at the sternum for a camisole, and it would just make sewing more difficult. Also smooth the curve along the bottom near the side seam for easier sewing. Cut out the new cradle piece. 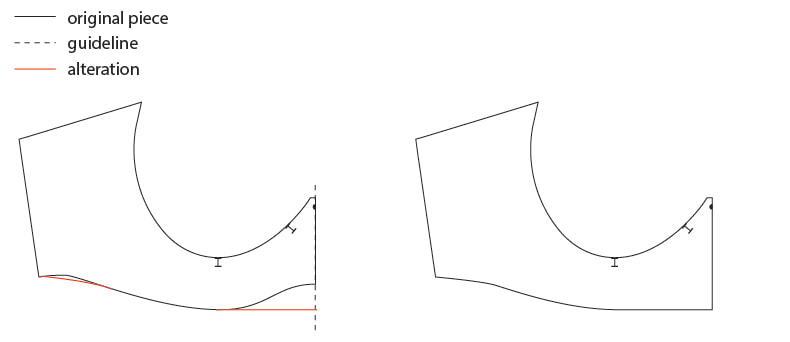 2. Draft lower front: Square a vertical guideline for center front. Near the top of the line, align the center front of the cradle, and trace the bottom edge. Measure down the center front the desired length we previously measured and mark. Continue marking this length across the piece, keeping your ruler perpendicular to the line traced from the cradle.  3. Now a bit of math to determine the width of the lower front at the hem: Take the desired circumference and divide by 4 (the lower front we are drafting represents ¼ of the body). My measurements are: 40/4= 10. Measure this length across from center front and mark where it intersects the lower body length. Join this to the top line where we traced the cradle to create the side seam. Adjust the curve at the hem so that the side seam and hem intersection is a right angle.  4. Add seam allowance: Add ¼” seam allowance at the top and side seam. Add your desired hem allowance to the bottom (can range from ½” to 1”). Do not add seam allowance to CF; instead mark it as “cut on fold”.  5. Square a vertical guideline and trace the back band. The bottom edge of the band has a slight curve, which we want to remove for easier drafting. Mark a straight line from the side seam to enter back. Cut out the new band piece.  6. Repeat the steps above to create the lower back, using the new band piece instead of the cradle, and adding length at the center back to create a right angle at the side seam/hem intersection.  Double check that the side seams are the same length for both lower front and lower back. Flared Babydoll VariationWhat if you want more of a babydoll style top? Draft the lower front and back as described through Step 3. 4. With lower front, divide the upper and lower edges into quarters. It doesn’t have to be perfect, we just want the flare evenly spaced.  5. Beginning at the hem, cut along the line stopping just before the upper edge. From the top of the paper, cut down to the top edge, creating a hinge. If you accidentally cut through the hinge just repair it with tape. Repeat this for all the lines.  6. Spread open the pieces, each the same amount. More spreading will mean more flare. In the pattern drafting world, this technique is called slash and spread. When you are satisfied, place more paper underneath and tape down the cut edges. 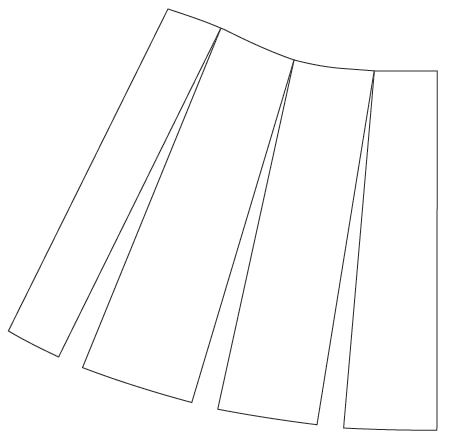 7. Draw in the hem and smooth out the curve. Also smooth out the curve at the top edge.  8. Add in seam allowances as described above. Repeat for lower back.  SewingNow, cut out all your pieces and let's get to sewing! Follow the sewing directions through Step 5 (and also Steps 11-12 if you are adding the back extension). For the sample in the photos I waited until the end to add the strap elastic so it would be easier for you to see the garment pieces. Essentially, the bralette is sewn except for the bottom band elastic. We will still be adding the band elastic, but it will be attached to the seam allowance of the bralette and lower body.  1. With RS together, sew the lower front to lower back at the side seams. Sew lower body to bralette with a stretch stitch. You could use a narrow zigzag, lightning stitch or serger. In the photo below I am showing what the RS of the garment will look like, but keep the bralette and lower body RS together for continuing to Step 3.  2. For the bottom band elastic, follow Step 13 of the pattern to determine length and join in a circle. 3. With RS of bralette and lower body facing, and the WS of the lower body facing up, attach the band elastic, plush side up, to the seam allowance only. Align the straight edge of the elastic next to, but not past, the stitching line sewn in the previous step. The zigzag stitching should be near the inner (straight) edge of the elastic.   4. Open the camisole out flat, with RS facing. The band elastic will fold back towards the bralette. From the RS, topstitch the band elastic with a 3-step zigzag or a wide zigzag.   inside of camisole 5. Fold back the hem and sew with a stretch stitch or double needle stitch. For my sample I added the same lace I used in the Tanja Boyshort sample. I overlapped the lace edge and garment edge ¼” and stitched with a narrow zigzag.  And, voila, your camisole is finished!  I hope you enjoyed this pattern hack tutorial. If you have any questions, or suggestions for another pattern hack, please comment below.
Until next time, Happy Sewing, my friends!
3 Comments
Alexia
4/16/2020 03:18:25 am
I love this! The pattern hack looks very doable. It will be a nice cold weather option as well.
LeeAnn
4/12/2021 08:01:07 am
Where can I get the actual pattern?
Cassie
4/12/2021 01:52:16 pm
Thank you. You can get the Iris Bralette pattern in my store. It is in the top menu, PDF sewing patterns, or here: https://www.primrosedawn.com/store/p5/Iris_Bralette_PDF_sewing_pattern%3A_soft_bra_for_stretch_knits.html Leave a Reply. |

CassieI design lingerie sewing patterns for everyday comfort and feminine style in an inclusive size range. Fill up your underwear drawer with beautiful custom-made bras and panties in your favorite fabrics and trims, designed to fit your body. 


Categories
All
Archives
March 2024
|


 RSS Feed