
|
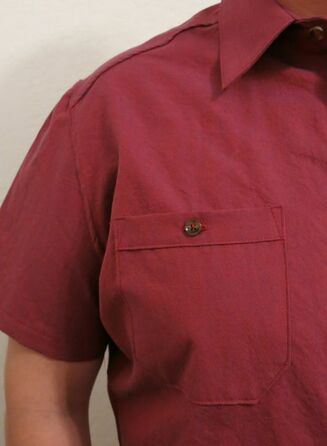
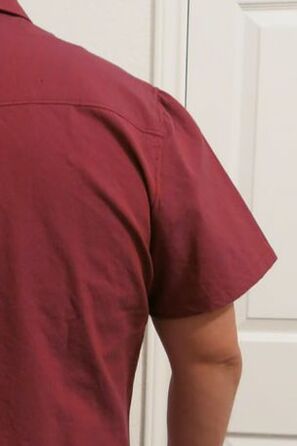
Remember the red shirt I made my husband for Valentine's Day? He loves it and has worn it several times, but there is a fit issue still bothering me.
Diagonal wrinkles from the armhole up towards the neck. This is a common fit issue in RTW shirts for him as well. I searched through all my books on fitting, and all of them say the problem is sloping shoulders. Before I made this shirt, I had adjusted the shoulder slope several times and I really didn't think that was the problem. The typical shoulder slope adjustment is to lower the shoulder line at the armhole edge, and then lower the armhole by the same amount to preserve the armhole length. The wrinkles in this shirt were not loose; in fact they were quite tight on his body. Just to be sure the problem was not the shoulder slope, I followed the instructions in this video from Threads, and traced around my husband's neck and shoulders to check the slope against the pattern. 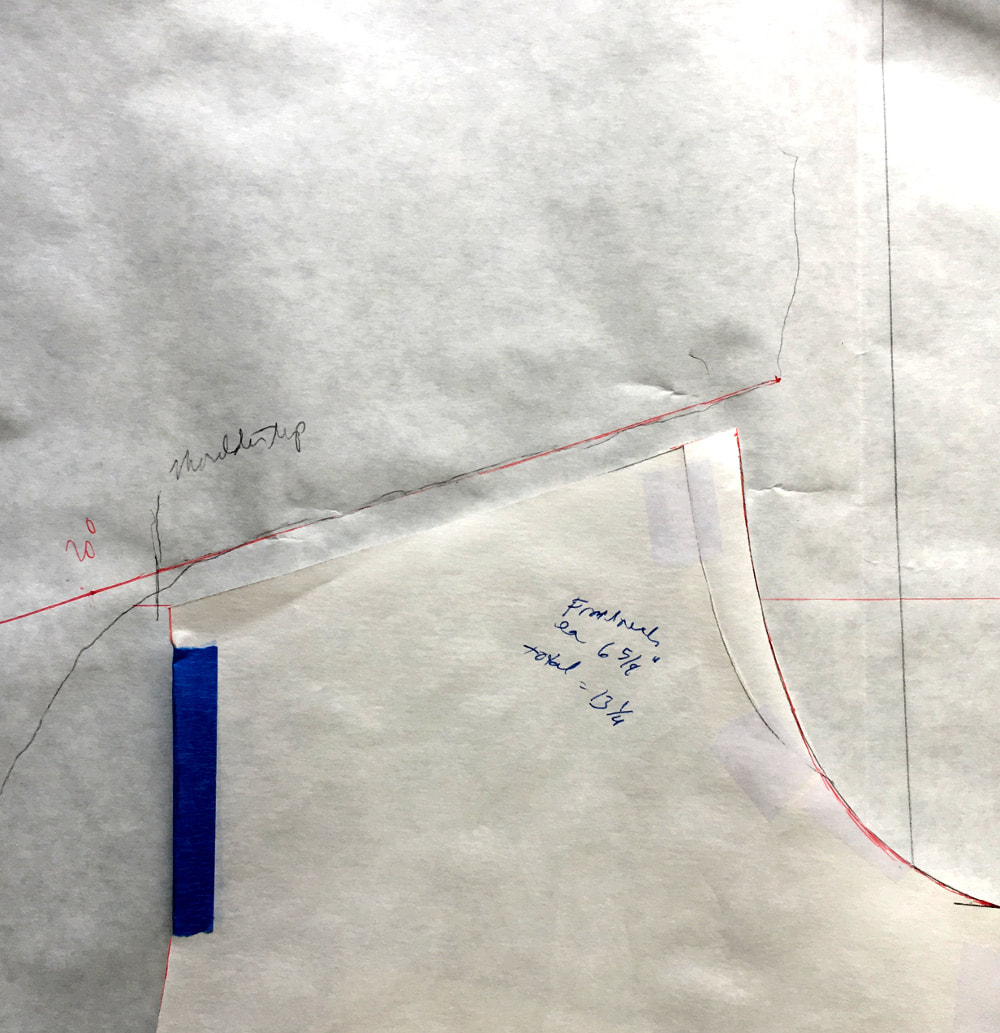 Spot on! So if that wasn't the problem, then what was? I continued to do more research on the internet, and came across a post in a sewing forum of someone having a similar problem in fitting a men's t-shirt. The issue? Atheltic build. More fabric is needed in the upper back and upper chest to accommodate muscles. So I traced off the pattern onto tissue paper, and drew lines across the upper chest and back. Beginning at the center, I cut them open, leaving a hinge at the armhole. I had my husband try them on carefully, and I let the tissue hang open. Sure enough, he needed about 1" on the front and 3/4" on the back for the tension in the tissue to be released. I don't have pictures of the fitting because he gets antsy and I need to work as quickly as possible. While I try to be professional (even with my spouse) during a fitting, I think he still feels I am negatively judging his shape and not the shape of the pattern. Something for me to work on, I think. 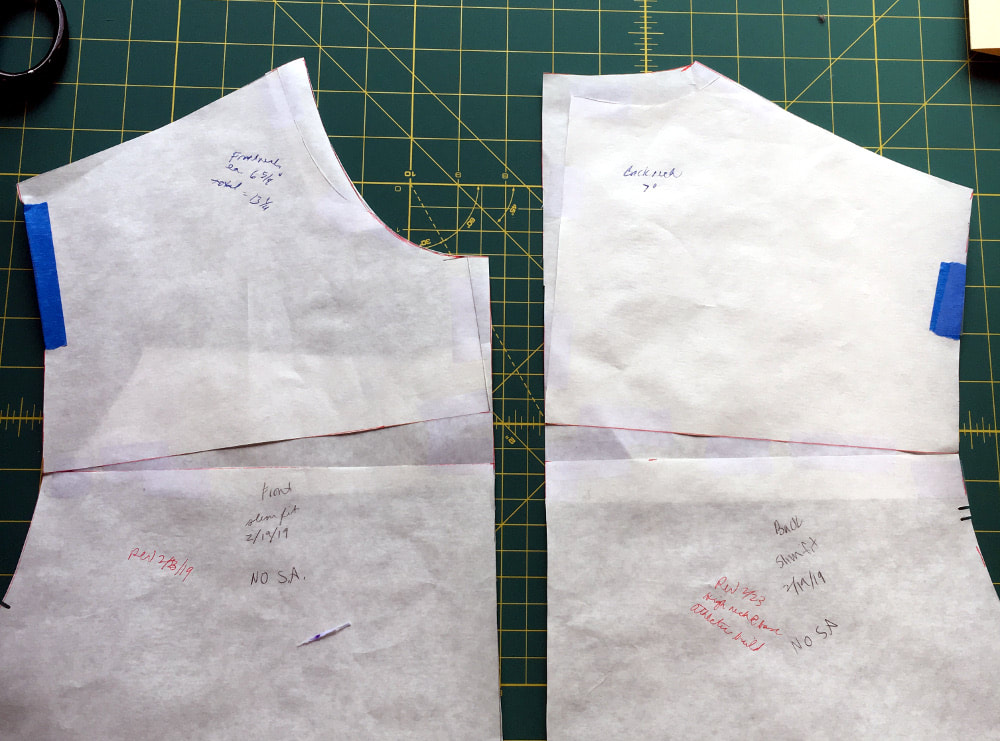 I had to re-draw the neckline, and also straighten the center back and center front seams. Time to work on a new muslin! These fitting issues are making me wonder if it would be worthwhile to develop a men's shirt pattern for athletic builds. The Sewcialists recently posted an interesting article on sewing for plus-size men. Sewing patterns for men already seem to be limited, and plus-size even more so. I already have a long queue of patterns I wish to develop, but I think I will add in a men's shirt for athletic builds in larger sizes.
Do you sew clothes for men? What sort of fit issues do you have?
4 Comments
I wrote in my previous blog post about why I began making shirts for my husband. So far I have only made two shirts from his custom-fit sloper, so we are still on the long journey of tweaking the fit. I made two basic patterns, one a 'standard' fit and one 'closer fit'. I usually make him an article of clothing for every gift-giving holiday. A few months ago I found some red/blue cross dyed cotton/linen on clearance in my local quilt store, and thought it would be perfect for a shirt. On the day I went to cut out this shirt, we were having some bizarre weather and it happened to be 80 degrees in early February. I realized that winter wouldn't be around much longer, so I opted for short sleeves. Fine by me, less fuss if I don't have to make a sleeve placket and cuffs! One of the things that drives me crazy about home sewing patterns (especially from the Big Four) is directions that include hand-sewing. There is no hand-sewing in mass-market production of clothing, so I know there must be a way to do it all by machine! Sometimes it seems the directions, especially for finishing, are purposely done so that the end product just screams homemade. So here are a few things I've learned for sewing professional looking shirts. If you want to learn some shirtmaking techniques, I recommend the book Shirtmaking by David Page Coffin. Especially for sewing the collar and cuffs, which employs the 'burrito method'. Nice crisp edges where everything lines up. The Sewaholic blog also has some great posts about sewing the collar and placket. 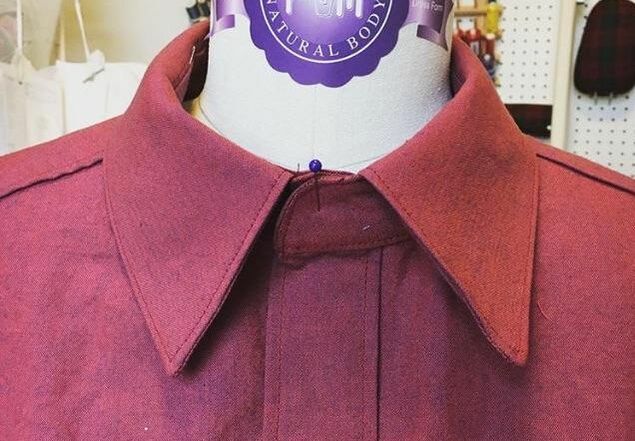 What else makes a good collar? Decent interfacing. And no, not the Pellon interfacing from Joann. I like to use Shirt Crisp from Fashion Sewing Supply. It's a bit expensive, but since I only use it in the collar and cuffs, a yard will last me quite awhile. The collar and cuffs end up so smooth, I love it! In the first sew shirts I made, I really struggled to get nice edges for my patch pockets. Then I saw a tip somewhere, I think it was the Colette sewing blog, to baste the pockets together, turn them RS out and press well. Then pull out the basting and you have nice crisp edges ready for sewing. 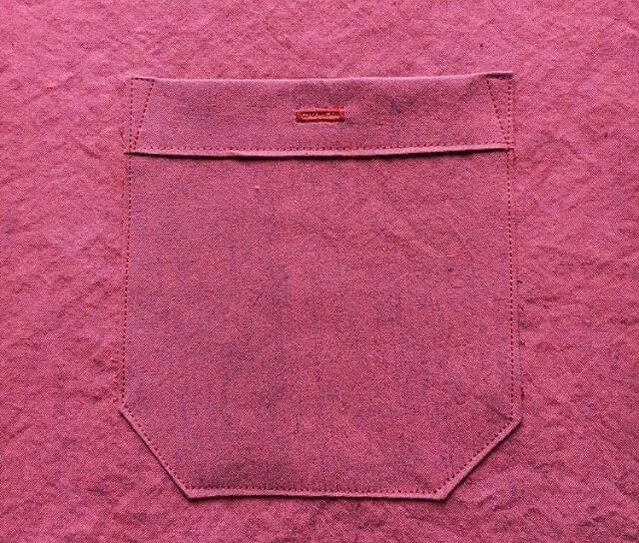 As you can see, my edgestitching still needs some work. Lots of edgestitching and/or topstitching is another thing you can do that will make your shirts look professional and not homemade. I spent some time examining the dress shirts in my husband's closet, and found that most of them had body and sleeve seams that were flat felled. I bought a flat felling foot for my machine on Amazon and figured out pretty quickly how to use it. Some people just use a regular presser foot and do some trimming, but I'd rather have the foot help me turn under the edge. While it works great for straight seams, setting in the sleeve was a bit challenging for me and I ended up with some puckers and ripples. 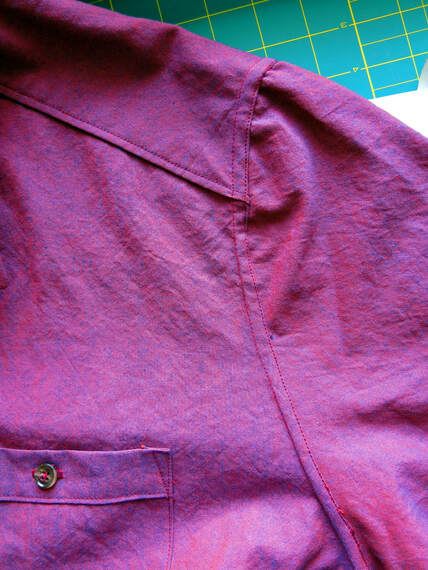 During the fitting process it seemed like a regular shirtsleeve with a wide and shallow cap just doesn't work well for him, so I was attempting to flat fell a pretty curved sleeve cap. I might have to alter my pattern a bit to reduce the curve just to make it easier to sew, or turn to french seams in the sleeve cap. 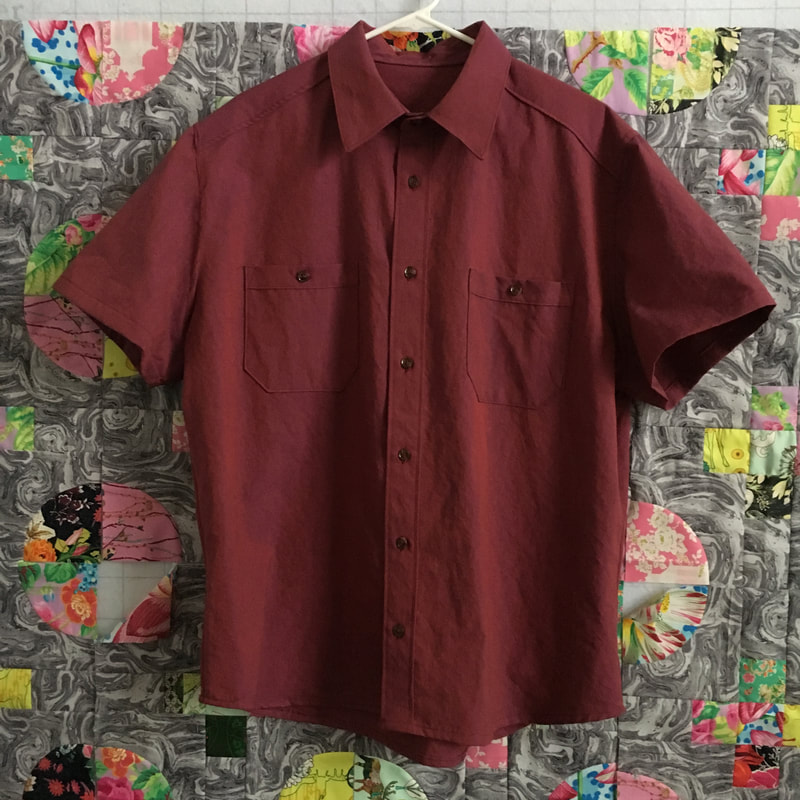 Overall I'm quite happy with how it turned out. My new Juki machine machine (an Excel F600) makes beautiful buttonholes, so there was no crying this time like there was on previous shirts, and there was no cursing and broken needles while topstitching through all the layers in the collar. 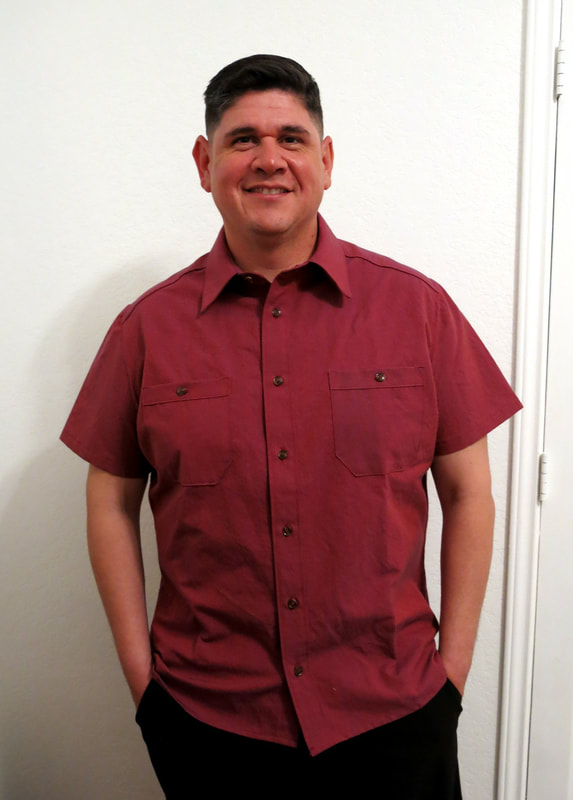 And, best of all, here is my happy customer. This big grin is why I sew.
|

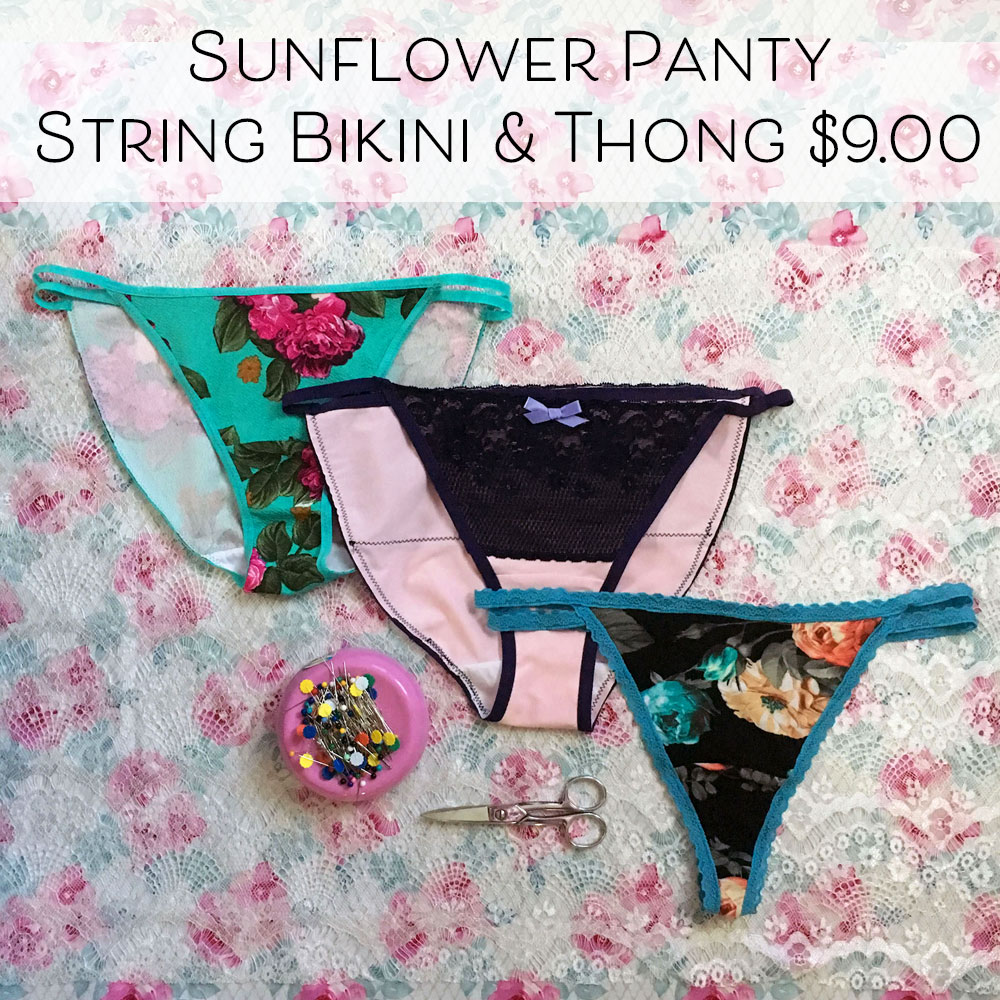
CassieI design lingerie sewing patterns for everyday comfort and feminine style in an inclusive size range. Fill up your underwear drawer with beautiful custom-made bras and panties in your favorite fabrics and trims, designed to fit your body. 


Categories
All
Archives
March 2024
|
 RSS Feed