
|
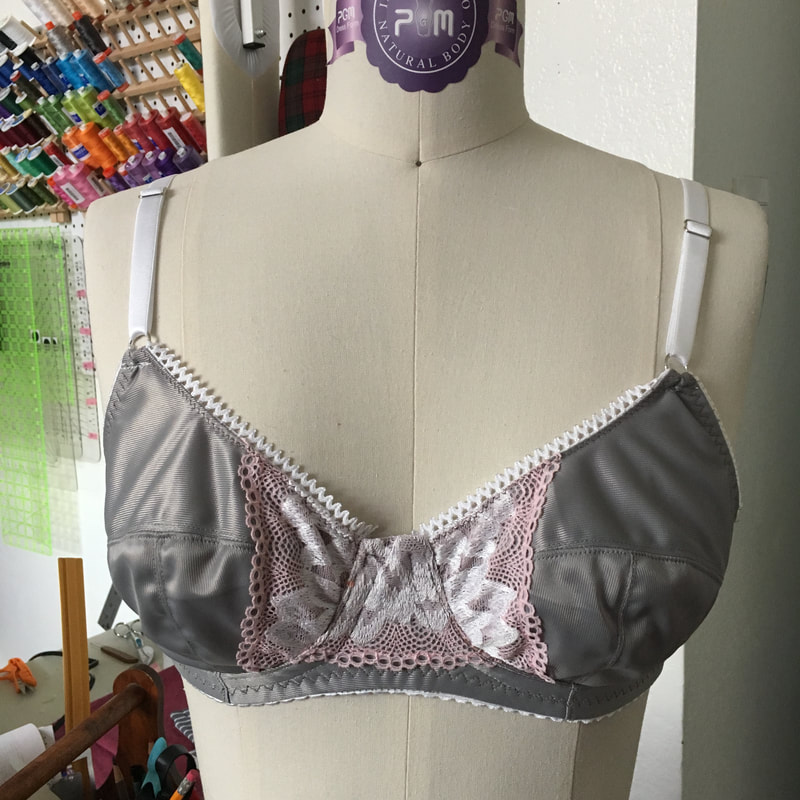
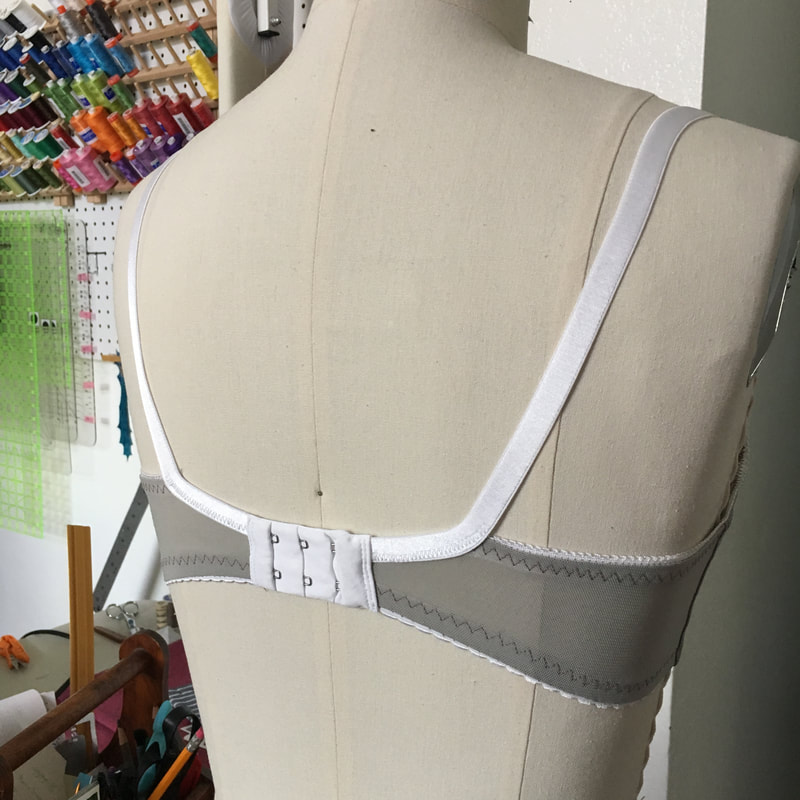
I have a friend who broke ten (!) ribs and her collarbone last December after being thrown off her horse. Since then her bones have mended, but she still has a lot of pain and swelling in her abdomen every afternoon. She told me that wearing a bra is very uncomfortable, and has mostly resorted to wearing only a camisole under her shirts. Now, my friend is about the same size as me, and she previously took a lesson from me in bra-making, so I knew she wouldn't think it too strange for me to make a bra for her. So a few days ago I issued a design challenge to myself, to design a bra that put only a minimal amount of pressure on the back. I was inspired by some of the wrap bralettes that have just come out, like the Gemini Bra by Gravity by Grandy, the Wrap Bralette by Merckwaerdigh, and also some triangle bras like the Jordy Bralette. I love the look of these bralettes but I was concerned that the multiple layers of wrapping and wide elastic would cause my friend too much pain. I wanted to stick with 1/2" band and strap elastic and see how much support I could get. Version 1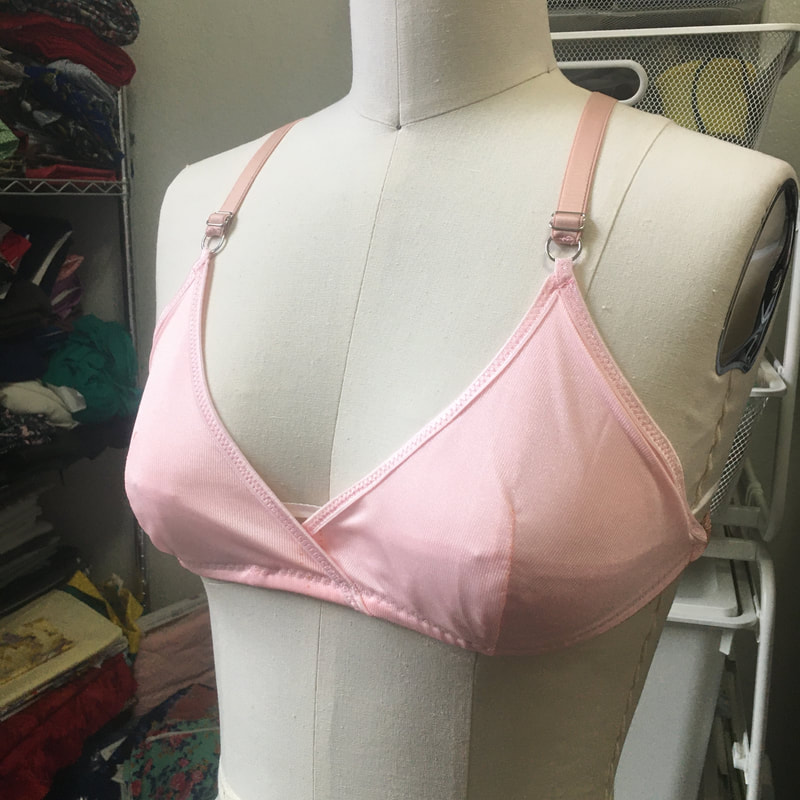 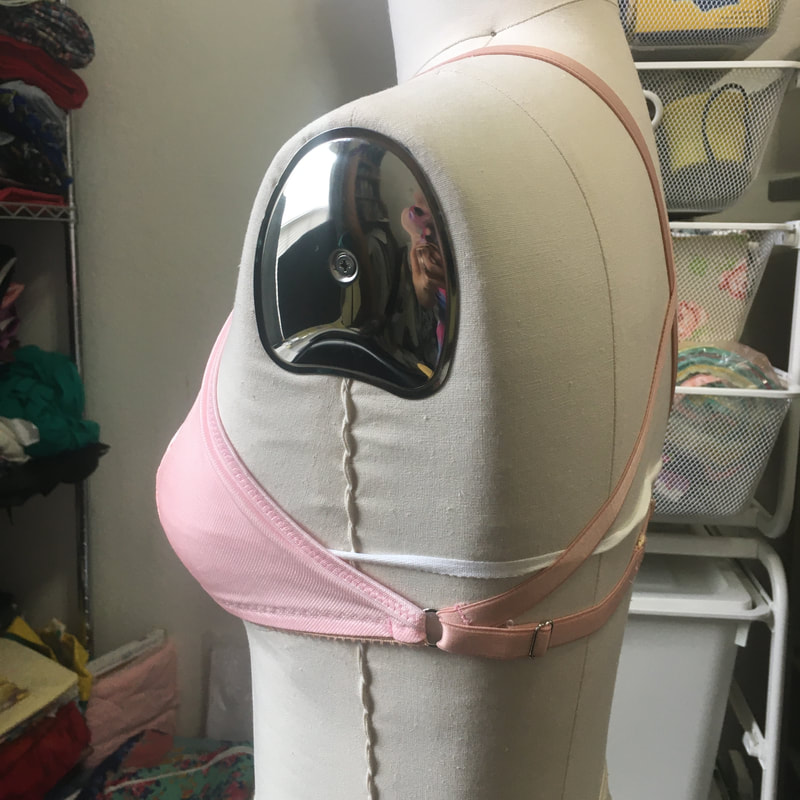  Here is my first prototype. Cups slightly wrapped at the front, extended onto the back. An adjustable strap for the torso with a front-bra closure. I originally had the straps attached straight down, but it just pulled up the torso strap, and I thought a halter neck would put too much pressure on the upper spine. Straps the crossed at the back and connected at the side rings seemed like the best option. I tried it on and was surprised that it did have a good amount of support. The closure at the back was unnecessary, and the cups needed to extend a little more to the back. The wrap front wasn't a good look on the body, the wrap mostly pulled apart and sagged, so that detail needed to go. I also needed to fill in the curves at the neck and armhole a bit. The fabric for this one is nylon tricot, two layers, with opposing stretch in each layer. I decided to try a stretch fabric in the next version. Version 2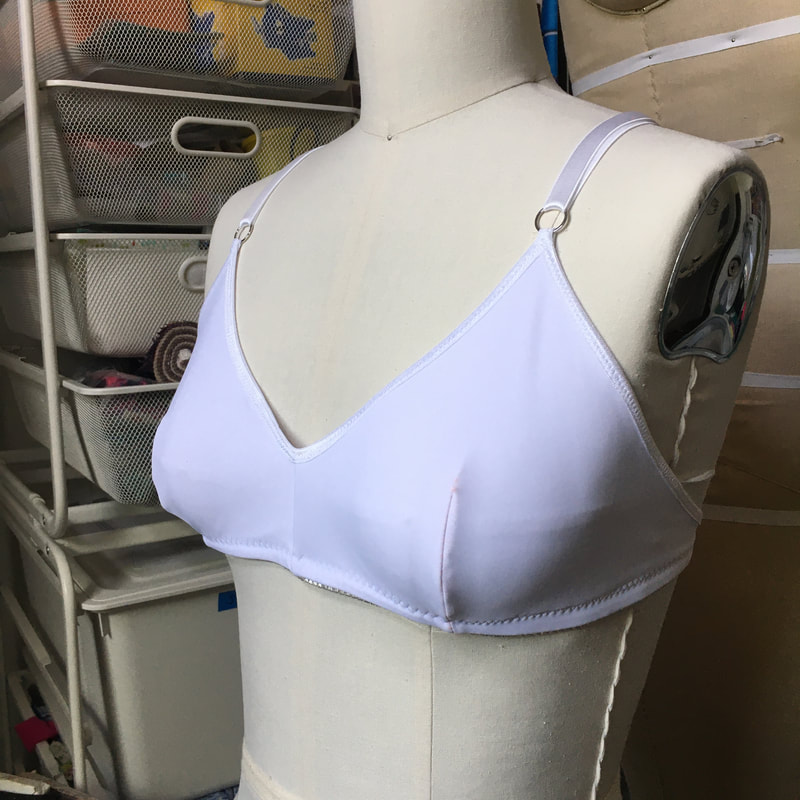 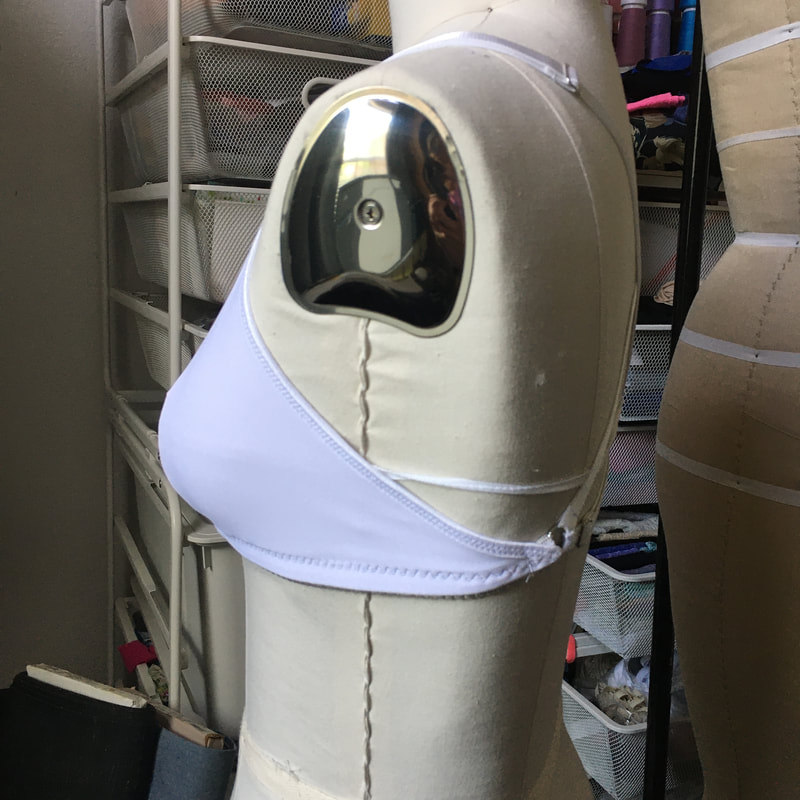 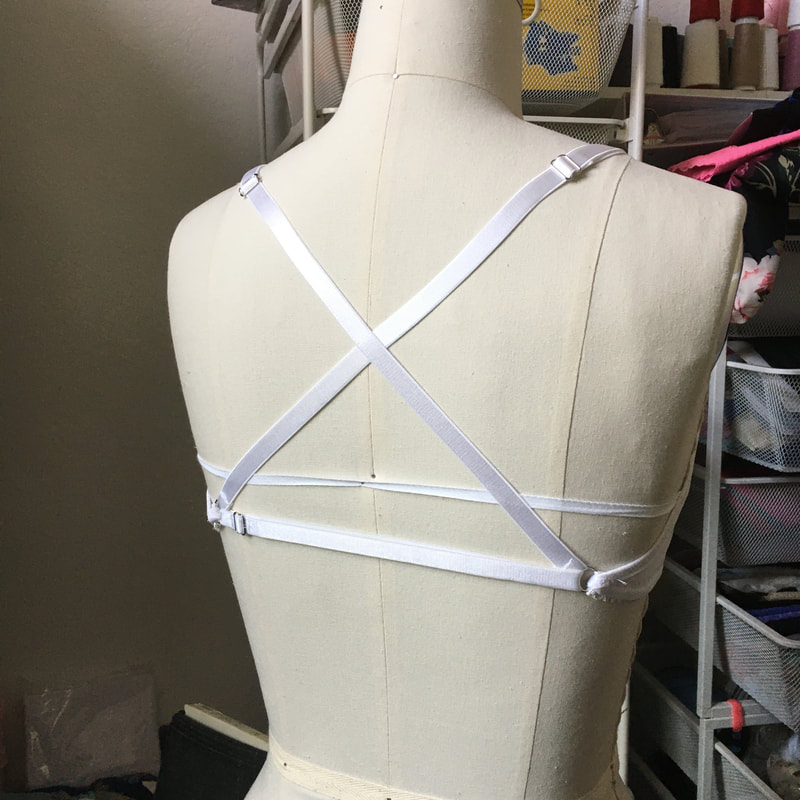 Much better! I love how it turned out. The back is simpler without the closure, and the shape of the cups is better, and the wrap front was changed to a v-neck. For this one I used two layers of pantie spandex by Sew Sassy. It is an 80/20 nylon/spandex knit with 75% stretch in both directions. The cups fit very smoothly, but I noticed the apex seems to be a little too far towards the side. For now, I will give this bra to my friend to try out and see if it is comfortable for her.
I want to make another bra for myself, and I'm thinking to try lace, and probably change the dart to a two-piece cup. I know someone will ask if I'm going to make this a pattern for sale. I'm thinking about that, and I honestly don't know if this style would really work for larger cup sizes. I would probably increase the width of the elastics as the sizes get bigger, but I'm not sure if that would be enough. I have gotten feedback on the bra patterns I have already published asking to increase my size range, so I definitely don't want to release a pattern only in small sizes because that really isn't fair. What do you think? Any interest in a pattern?
0 Comments
Bodies come in all shapes and sizes, and very rarely do we fit perfectly into a pattern straight away. Pattern designers create patterns with a measurement chart of "standard sizes", but each size chart will vary by company. You might fit perfectly into a single size, or you might find that your individual measurements span several sizes. In the tutorial below, I will share you with how to adjust your panty patterns when your waist and hip measurements fall between two different sizes.
In my previous post, I talked about creating a custom bra draft using the method from the book Bare Essentials Bras, 3rd edition by Jennifer Lynne Matthews-Fairbanks. After finalizing the fit of the bra draft, the 3-piece cup, cradle and band are turned into a sloper to make custom bra designs. What is a sloper?A sloper, in fashion industry terms, is a basic building-block pattern without seam allowance or design lines. It is used as a starting off point to create various designs. For a bra, the sloper includes a basic cup, a cradle without bottom shaping and a back band. Here's a peek at my sloper, drafted in Adobe Illustrator.
 I'll begin this post by saying I have not been paid in any way to endorse or give a review of this book. I'm just a bra-making fangirl giving her opinion!
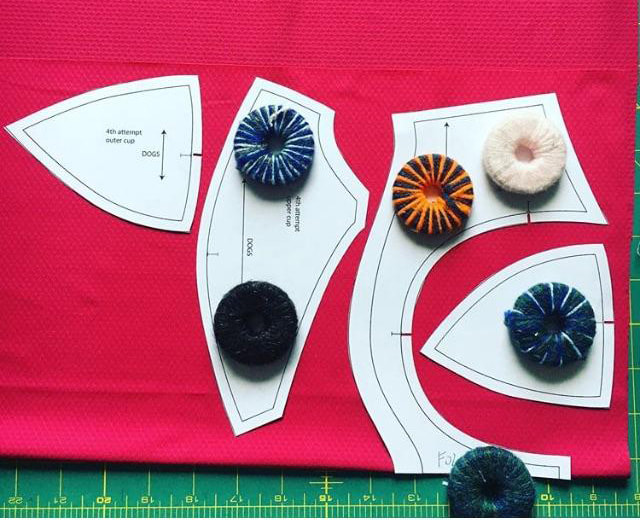
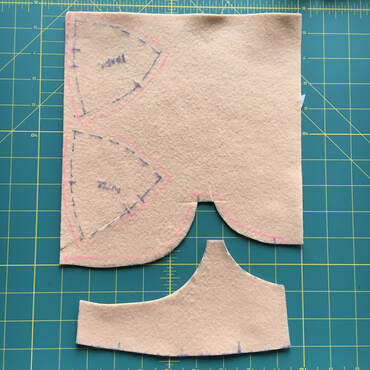
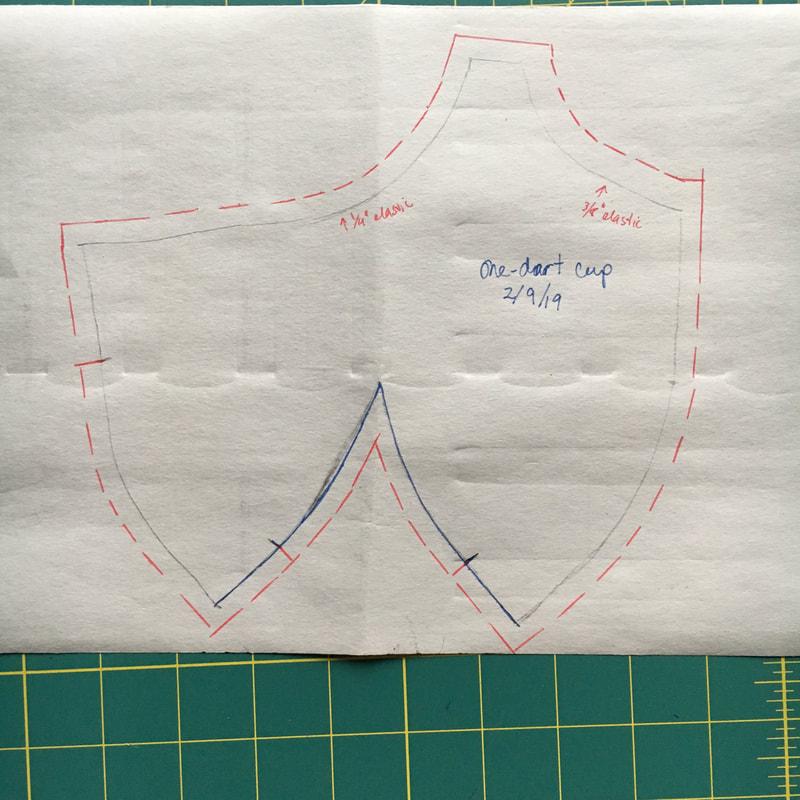
I was so excited when Jennifer Lynne Matthews-Fairbanks came out with the 3rd edition of her book Bare Essentials: Bras. This new edition has a whole new drafting method that takes into account torso size and shape for a completely custom fit! I have the previous edition of her book and found it monumentally helpful for drafting bra patterns. I haven't been completely satisfied with my Shin draft, (there were too many unexplained variables in the drafting instructions) so I wanted to try a different drafting method and compare. A couple weeks before Valentine's Day, someone in the Bra Makers Group on Facebook mentioned quarter-cup bras and it got me thinking about barely-there bras more suitable for boudoir than everyday wear. Later on I came across this series on power bars by Silver Lining Atelier, and this bra in the photos. 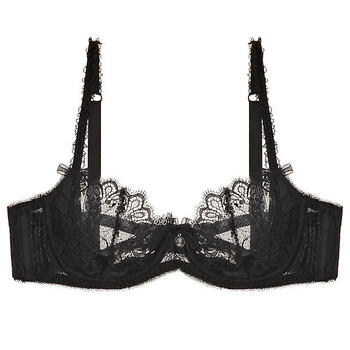 Photo from Silver Lining Atelier Thinking back to the discussion on quarter-cup bras and my interest in trying out an internal power bar, I decided to try making my own version of this bra. My self-drafted bra has a horizontal cross-cup seam, so in order to make the scallop edge of the lace across the top edge, I needed to draft a one-dart cup. In Beverly Johnson's bra-making classes on Bluprint (formerly Craftsy) she uses bra foam to sew up a cup, then draw the new seamlines and cut it apart to form the new pattern pieces. I only have a small amount of bra foam, and I didn't want to use it up so I wondered what else I had on had to use as a substitute.
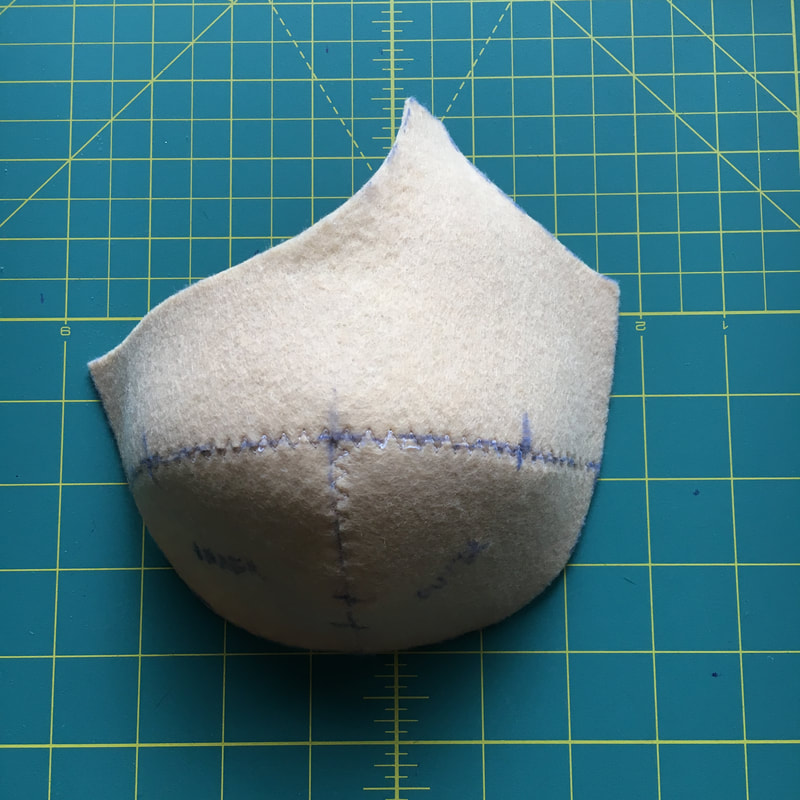
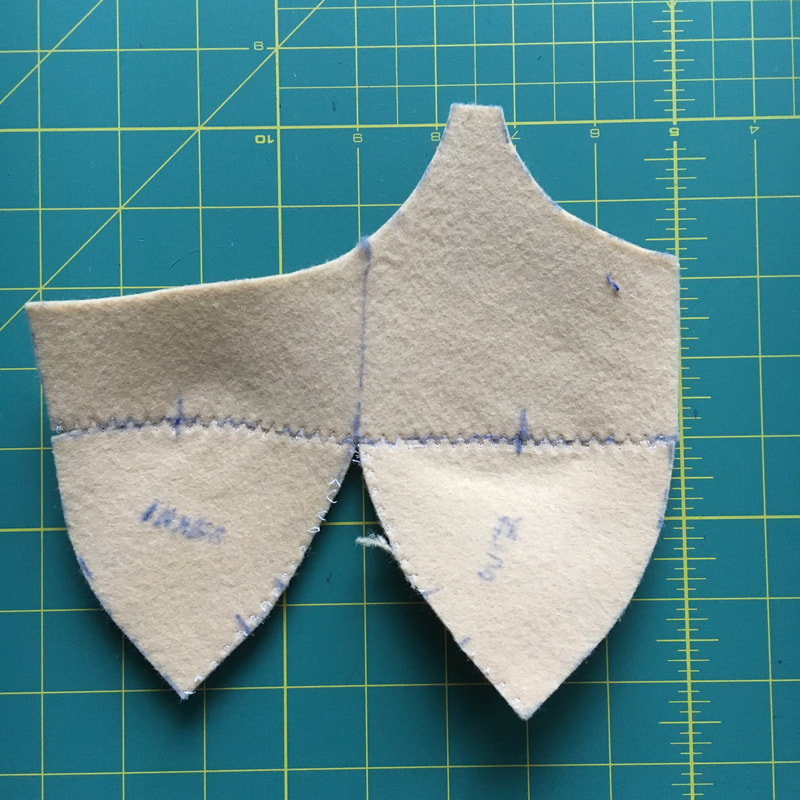
Felt! I had lots leftover from making Christmas stockings. After trimming off the seam allowances, I used a 3-step zigzag to sew the cup pieces together.
After sewing the cup, I realized that the dart would be right where the lower cup seam was, so I just cut open where I sewed. Seems a bit counterproductive, and there is probably a more accurate way of doing it with the paper pattern. I'm sure I'll learn someday! So to make the balconette cup, I cut off the cup about 3/4" above the end of the dart. I should have checked the measurement of the top of the cup, but I didn't and it ended up being too big. I unpicked some of the sewing on the narrow elastic and shortened it to create more tension across the top of the cup. Still not a snug fit, but this bra is more for show than function. 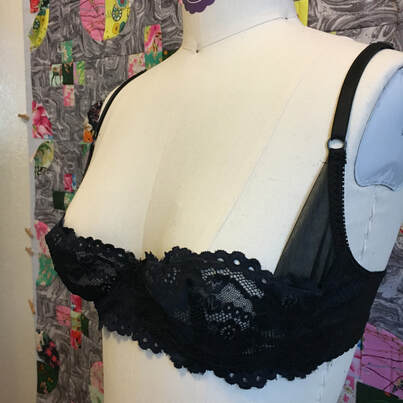 While the fit isn't perfect, I'm quite happy with how the overall design turned out. The power bar does it's job and directs the breast tissue toward the center. 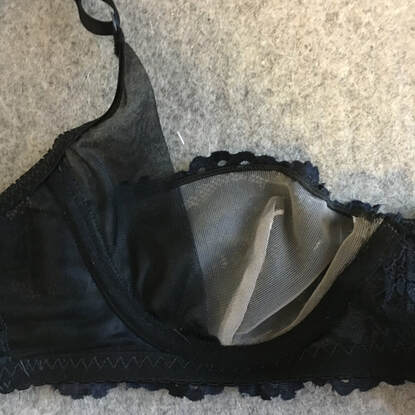 As I mentioned in my previous post, I have dived down the rabbit hole of drafting my own bra patterns. While I really love my Harriet bras, after wearing them for awhile the wires start to poke me at the sides of my breasts and leave bruises. I wondered why an otherwise well-fitting bra would do this, so I did a bit of research and began to learn about breast shape and the different underwires available to fit them. Just as overall bodies come in various shapes and sizes, so do breasts. This blog post from LilypaDesigns was really helpful in learning about shapes and distribution of fullness, and Emerald Erin's guide on underwire styles was very interesting. I found I am wide set, with wide roots and bottom fullness. While I could try out various patterns from other people and fiddle with the fit, my stubborn determination kicked in and I decided to just make the pattern myself. Enter my new favorite book: Patternmaking for Underwear Design by Dr. Kristin Shin. This book covers all sorts of lingerie design, not just bras. It reads much like my patternmaking textbooks from college; the draft is shown in a standard size (34B) and it is up to you to implement your own measurements. There is no handholding at all, so if you are unfamiliar with patternmaking it might be a challenge. It all begins with fitting the underwire. Some blogs I read recommended ordering wires in different sizes and seeing which one worked best. This seemed a bit willy nilly to me, and since I already have several sets of wires that were too narrow I didn't want any more. I wondered if I actually needed a completely different style of wire. Luckily, I read about making a breast root trace. You can read about it here, just be warned that there are photos of a somewhat naked breast. I don't have a flexible ruler, so I used some jewelry-making wire doubled up. In the photo below you can see my root trace compared with the size 38 underwire which seems to fit me perfectly. 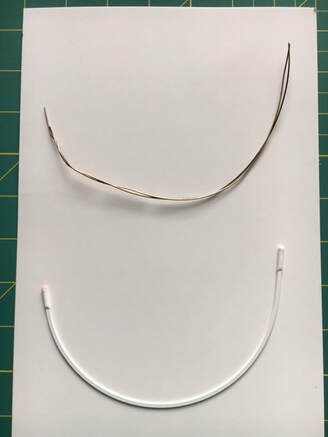 Now that I had a well-fitting underwire, I began drafting my pattern. I took various measurements indicated in the book and did my best to follow the diagrams. The only thing that confused me was the angle between the cradle and band. The directions were rather vague, and this ended up causing some fit issues with both the bras that I have made from this pattern. 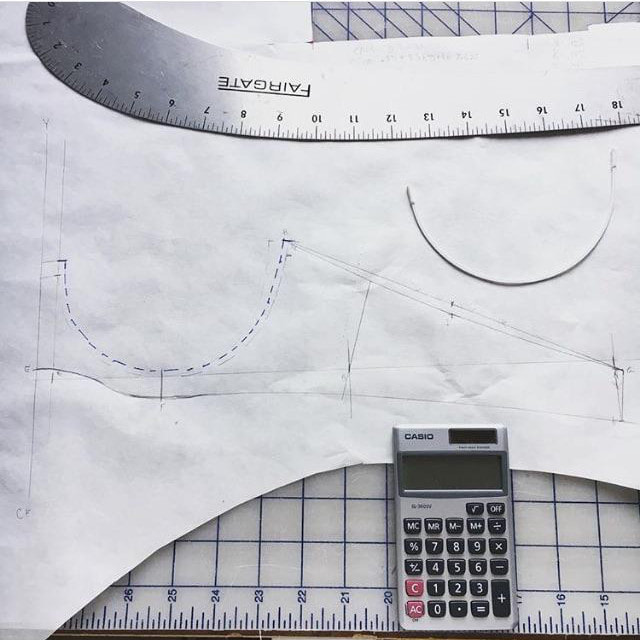 And now, here is my first bra made from my self-drafted pattern. 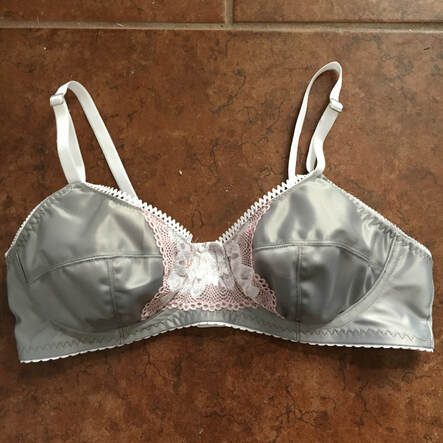 Go ahead and snicker at my funny looking lace butterfly. I had little bits of this lace leftover from a Harriet bra, but I ended up making the wings too small. Oh well. The outer cup and frame fabric is duoplex. There are actually no underwires in this bra, because they didn't fit into the casing! Somehow Dr. Shin forgot to accommodate for wire play, and there simply wasn't enough room to jam in the wires without them sticking out from the top of the bridge.
My dress form isn't quite as big as I am, so the bra isn't quite filled out. 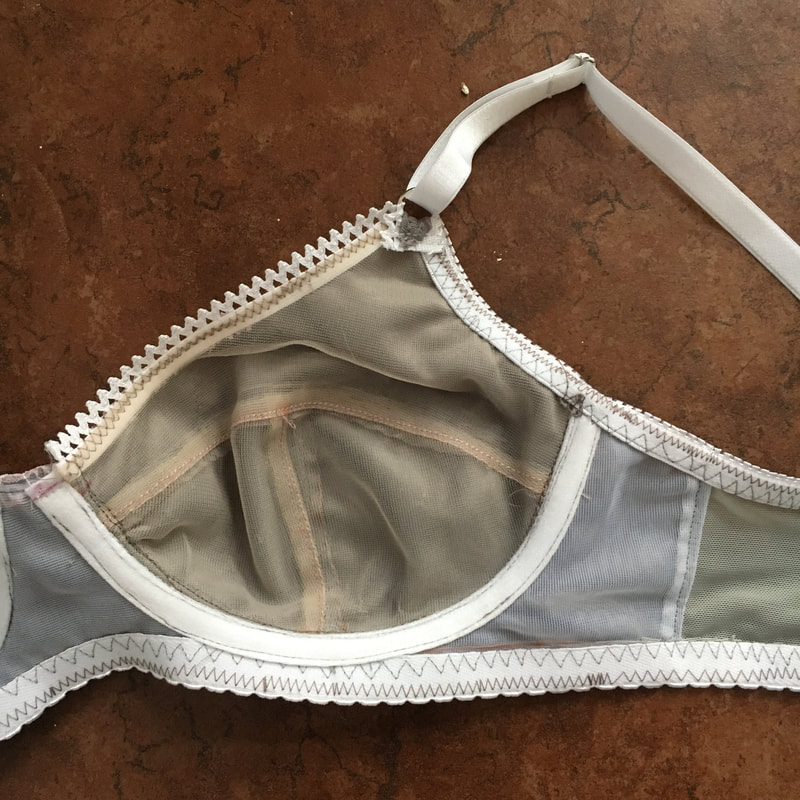 When I first started making bras I wondered what sort of finishing bra-makers did, so I like to share the guts of my bras so others can see. I line my bra cups with 15D tricot. As you can see, I was struggling with my feed dogs while sewing the elastics. My sewing machine is pretty new, and we are still getting acquainted.
So what did I change? Most importantly, adding in some wire play. That means raising up the top of the cradle/band seam 1/2" so the wire have room to move a bit and won't jam into my sides. I need more coverage in that area anyway, thanks to what I lovingly call my armpit fat. Remember how I said the instructions were a bit vague on the angle of the cradle/band seam? Well apparently I didn't make it angle down enough, and ended up with fabric bunching up on the sides. To fix this, I have angled the band down more at the top, adding about 3/8" at the top of the cradle down to 0 at the bottom. Also, I'm not a fan of sewing the O-rings at the top of the cup. I appreciate that it makes the straps easy to adjust, but all those layers usually make me break a needle. I'm trying out a different strap attachment next time. Have you tried to draft your own bra? Was it a successful fit? What resources were helpful? |

CassieI design lingerie sewing patterns for everyday comfort and feminine style in an inclusive size range. Fill up your underwear drawer with beautiful custom-made bras and panties in your favorite fabrics and trims, designed to fit your body. 


Categories
All
Archives
March 2024
|

 RSS Feed